Hondo your replies are gold, i'm very thankful for all the help you're giving me.
I probably won't go with the Power Custom ½ cock hammer, reason being it's still designed for the transferbar so the hammer has those steps rather than the smooth face that i find aesthetically pleasing. Also it wouldn't be much of a project, and i really enjoy the project part. So we can rule that out.
Now the Old Model style hammer they offer seems like it might work, i'm slightly confused though can you go into detail on what mods i'd need to do to fit it? Also would that hammer be the only part i need? And are you saying that's it's just the same as a Factory OM hammer, seems like one of those would be much cheaper.
And yes i would absolutely love the guide on the full OM conversion, i was just looking at my Vaquero today and i just realized it had no screws in the frame! Then i watched a Youtube video on how to dissamble it and it's completely different than the revovlers i'm used to. I'm a huge proponent for simplicity which is why i love the 3 screws. That would definitely be my choice if i can handle it.
And one last question for now, i've already started my search for a base gun for this project. I wont be using my current Vaquero since it's a 5½ and in to good of shape. If you know, the question is how to tell if a NMV has a gripframe lock? Like is there a certain serial number range or something? Thanks[/quote]
jmar,
You're very welcome, happy to help.
1. To use the PC 1/2 cock hammer, the very thick Ruger trigger sear must be thinned down from the front side (like an old model Ruger trigger). The rear corner of the trigger, which is the actual sear is not touched. That's why PC sells the modified trigger, but it's so easy to do, it's not worth the cost IMO.
The 1/2 cock hammer can be used with or w/o the transfer bar. But w/o the transfer bar the front face of the hammer must be flattened to look like an OM hammer; just grind or file off the top step to make a flat face.
2. Using the PC registered hammer, the PC Bisley hammer for old models, or an original OM hammer is almost the same. None can be used with a transfer bar because they have the flat face. All three need the trigger modification as described above to fit in the 1/2 cock notch (or safety and 1/2 cock notch of the PC om Bisley and original old model hammer.)
To use the PC Bisley hammer 'for old models' or an original OM hammer, there's two additional modifications required:
1. Shim the screw hole, because the OM screw is slightly larger than the NM pin. And that's simple: take a 22 case with bullet and powder removed and primer fired which is just the right size, (a fired 22 shell won't work because it's expanded), press it into the OM hammer screw hole in a vise, and cut the case off flush on both sides. Debur the edges and clean out with a 22 bore brush. Now the NM hammer pin will fit perfectly.
2. Cut the transfer bar connecting boos off of the trigger to clear the hammer bases.
With any of these hammer options, I cut off the shaft protruding from the cyl latch and the loading gate will be freed up so you can cock the hammer with gate open. That's my contribution. Craig's comment is limited to his knowledge of just the Power Customs 1/2 cock hammer instructions which results in: the 1/2 cock hammer can only be cocked if done before the gate is open w/o my latch modification.
3. Yes, the NMV w/o lock has a 512 serial # prefix. 510 & 511 have locks.
4. This is a project. Not really difficult, just might sound that way.
Most authentic conversion from a NM to 3 screw Old Model, with four hammer 'clicks' (also with or w/o transfer bar safety), but with the transfer bar there is no interaction with the loading gate or the cyl latch. Loading/unloading is strictly the OM way by ½ cocking the hammer. Therefore chambers always align properly with the loading gate trough.
Here it is step by step:
You'll need the following OM action parts or optional parts: hammer or one of those mentioned below under hammer options*, cyl latch, latch spring, Colt 3rd generation hammer screw .220" x 28. Note: A disassembled old model for reference and measurements is a must.
Note: on stainless conversions: Every internal part won't be stainless; the OM parts, such as the cyl bolt, loading gate detent screw and plunger, trigger return plunger and possibly hammer depending on the option chosen above. But all the springs will be 'cause they always were.
TO START: Gut all internal parts from a NM SA and put them aside except the trigger, cylinder pawl and cylinder base pin.
*Hammer options:
1. A carbon steel OM hammer with a polished or brushed finish (if you want to look like stainless) or Powers Custom three screw Bisley OM hammer replacement (not stainless either). Hammer face modification to form a step is needed on both if the transfer bar safety IS retained.
And the hammer base must be relieved on the right side to match the original NM hammer for transfer bar and trigger boss clearance.
2. Powers Custom stainless NM half cock standard or NM Montado/Super half cock hammer. Hammer nose modification needed if transfer bar safety is NOT retained. The safety notch is useless anyway but a small shelf can be added at the right location for the "click". Enlarge hammer assembly pin hole in base to fit the OM screw.
Tap hammer pin hole in left side frame to .220" x 24 threads and enlarge hammer pin hole in right side frame for clearance and counter bore for the hammer cap screw.
Trigger options:
The NM trigger/cyl bolt pin hole in frame does not align with either of the OM trigger or bolt screw holes. The trigger/cyl bolt pin hole must be tapped on left frame side and counter-bored on right side for the cap of a machine screw* to use with the NM trigger.
NM trigger is modified by grinding the spring perch web off the back for use with an OM return spring and plunger an Old Army stainless grip frame, (note: it's an XR3-RED size). Any NM grip frame can be used with its standard trigger return spring by not grinding off the trigger spring perch web. Or by making the well known adapter** and OM spring and plunger for the true OM look.
Also cut off the transfer bar boss (unless transfer bar is retained. If retained, the lower right side of the OM hammer will need to be relieved to match the relief cut in the NM hammer.)
The NM trigger stop at the top area must be removed for clearance of the added OM cyl bolt screw.
And the NM trigger sear must be thinned to fit the OM hammer notches or the Power Custom ½ cock hammer, exactly like the Power Custom trigger they supply for their ½ cock hammer or buy the NM Power Custom trigger with already modified trigger sear.
Trigger return spring options:
1. OM trigger plunger/spring with a trigger spring adapter to use the existing NM grip frame.
2. replace grip frame with Ruger Old Army Stainless 'KXR-3' with wide trigger slot and provision for trigger return spring/plunger.
3. Retain NM trigger spring.
To be completely authentic by using an OM narrow (there's no steel OM grip frames with narrow trigger slot) or SBH wide trigger:
The trigger/cyl bolt pin hole must be plugged with two oversize pins, 'peen blended' and polished over flat. Then a new 8 x36 trigger screw hole drilled and tapped*.
Cylinder bolt:
Locate, drill, counter-bore and thread 8-36* a new cyl bolt screw hole in the old model location. Use an old model cylinder latch (stop bolt) and return spring. Drill small hole inside frame to capture end of the above return spring.
Loading gate:
Use OM gate and polish bright for a SS gun. Or existing NM loading gate can be modified to the OM gate style with two flats for the open and closed detents. Grind off the half round protrusion at the back end of gate shaft to disengage from transfer bar if the bar is retained. In either case, drill and tap hole in the bottom of the frame for an old model style gate plunger, spring and set screw.
Cylinder base pin:
You can use the SS cyl pin with the plunger in the end or remove plunger. Or use OM carbon steel pin polished bright.
* Details for the action screws:
Hammer screw option - Make a fake screw/hammer pin, from a large enough screw to remove threads and end up with a shank the size of the pin .202" and a slotted cap the size of the OM hammer screw cap.
Trigger screw – the existing NM trigger pin hole is perfectly sized to tap on left frame side for a stainless 8x36 machine screw which you can buy. Slight dressing down of the threads will allow it to fit thru the NM trigger hole.
Cyl Bolt screw – same as Use the factory OM screw. Drill and thread hole 8x36 for it.
Turn down the 8x36 screw caps of the trigger and cyl bolt screws a little smaller than the two original OM 8x36 screws and they won't look too close together at first glance. Drill the right side frame holes to fit the screw caps.
Locating and Drilling 3rd screw hole in frame:
I measured with the screws in the holes and the screw slots perpendicular to my line of measurement. It's easier to judge the center of the hole that way, as long as the screw slot is cut in the center of the screw cap!
The cyl latch screw hole ctr is .877" from the ctr of the hammer screw hole. And it's .185" from the ctr of the cyl latch screw to the bottom of the cyl window. Scribe a line for each measurement and center punch where they cross for the ctr of the new hole to be drilled. I always start a precise hole with a 1/16" center drill to enlarge the punch dot. Then follow with a little larger pilot drill all the way thru the work. Then the final tap size hole. I use 'gun taps' (2 flutes). The trickiest part is clamping the tapered frame so the hole goes thru at a right angle to the frame ctr line.
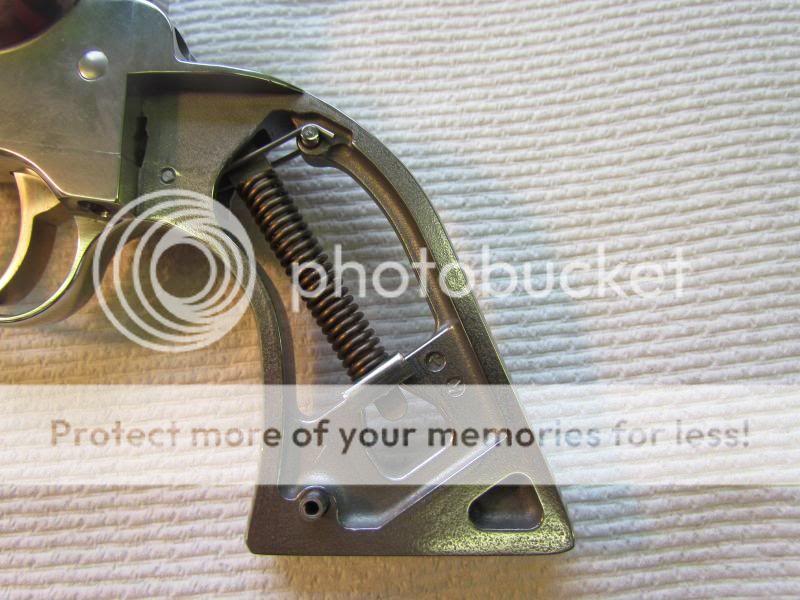
**You can make the simple aluminum adapter below to fit in the NM GF behind the old model trigger or just use a .22 LR case to hold the return spring and plunger in place. Either will need the one NM trigger return spring retaining pin closest to the trigger shown below 2nd photo, to hold your OM trigger return spring/plunger adapter or .22 case in place. File a small notch in the .22 case head to nest on the retaining pin.