Converting a Vaquero to a 3 Screw Style Action

Help Support Ruger Forum:

jmar

Bearcat
Joined
Sep 26, 2016
Messages
47
I'm looking to build a gun and i was intending to use a 3 Screw Blackhawk as the base because i was told that they were the smallest and i absolutely need the 4 click action. I bought a Blackhawk but it turned out it wasn't the type of gun to be modding up. As i said i was told the OM .357 was the smallest you could buy but i happened to compare it to my New Vaquero i never use and it turns out the frame and cylinder are the same size...

I want a gun that ends up looking like a Colt SAA but with the Ruger reliability and strength. So if i went with an OM BH as the base gun i'd need to weld and mill the top strap as well as bore it to .45. But after my revelation comparing it to my New Vaquero i'm thinking it may be cheaper and much easier to convert it to the Old Model action since it already is cosmetically correct.

So question time, what would be the best way to convert a New Vaquero to a traditional 4 click action 'half cock and free loading gate'? Has it been done? Possibly if i took the guts from an Old Model .357 would they all fit with minor modifications? Thanks, and sorry for all the newbie questions iv'e been asking!
 

Jimbo357mag

Hawkeye
Joined
Feb 22, 2007
Messages
10,350
Location
So. Florida
Power Custom has many parts to convert new model actions to more traditional action.

http://powercustom.com/store/index.php?main_page=product_info&products_id=136
 

Bob Wright

Hawkeye
Joined
Jun 24, 2004
Messages
7,731
Location
Memphis, TN USA
Durn it! Ruger man that I am, I'd say get yourself a Uberti. I've got a Cimarron/Uberti Model P in .44 Special and very satisfied with that.


Bob Wright
 

jmar

Bearcat
Joined
Sep 26, 2016
Messages
47
45Colt_Man said:
Might check here.
4 Click action job listed under GunWork tab.

http://westfargogunsmith.cas-town.com/index.html
Good to know, that's a pretty good price although i was wanting to do the work myself.


Jimbo357mag said:
Power Custom has many parts to convert new model actions to more traditional action.

http://powercustom.com/store/index.php?main_page=product_info&products_id=136
I was just looking at those actually, i wonder if this is all i need? http://powercustom.com/store/index.php?main_page=product_info&cPath=12&products_id=1119


BlkHawk73 said:
Just curious why the 4 click as well as the Ruger strength is a necessity?
Just preference i really dislike the modern transferbar action.


Bob Wright said:
Durn it! Ruger man that I am, I'd say get yourself a Uberti. I've got a Cimarron/Uberti Model P in .44 Special and very satisfied with that.


Bob Wright
I do love Uberti, i come from the cap and ball world actually and love their historical accuracy. But it just wont handle the abuse of what i need it to do sadly.
 
Joined
Dec 19, 2001
Messages
10,129
Location
Alaska, Idaho USA
How much abuse are you talking. Lot's of Uberti's get used in CAS with a lot of shooting. They are tougher than most people think. There are a few tricks some of the CAS's use to tune them up that make them last longer too. I'd look at that.
 

jmar

Bearcat
Joined
Sep 26, 2016
Messages
47
Bear Paw Jack said:
How much abuse are you talking. Lot's of Uberti's get used in CAS with a lot of shooting. They are tougher than most people think. There are a few tricks some of the CAS's use to tune them up that make them last longer too. I'd look at that.
It needs to stand up to general shooting, shooting hot loads, dry fanning, quickdraw, twirling, and sitting at my desk playing with it all day. Basically a good strong shooter when i go shooting, and something to fiddle with when it's freezing out. No i don't think i'm a cowboy and i don't compete or anything i just get very bored very easy :D

I've never owned a Uberti but i've owned quite a few Piettas and everyone i've owned but one broke it's cylinder hand in the first few days/weeks. I defiantly need a coil setup like Rugers for all the springs. Ubertis have great quality from what i've heard and seen but everyone says Rugers are the toughest and since Rugers are the same price or even cheaper i think it's the best choice. Also i love gunsmithing projects. Plus they have much more parts available, and are made in the USA.
 

Lngstrt

Single-Sixer
Joined
Dec 6, 2015
Messages
119
Location
Phoenix ... Land of the Blazing Sun!!
I have a couple old Virginian Dragoons ........ One 45 one 44 mag. Big strong traditional SA's. Big, hefty frames.

Here's the 45:

VirDra45a%20copy_zpsmm2yxtwj.jpg


VirDra45b%20copy_zpscwv9h0lb.jpg
 

Hondo44

Hawkeye
Joined
Apr 3, 2009
Messages
8,051
Location
People's Republik of California
jmar,

All good questions! There are several options here to cover, all of which I've done at least once:

1. Power Custom ½ cock hammer (with their modified trigger or modify yours) would be the easiest approach, although you'll only have 3 clicks, not four, the loading gate will be freed up so you can cock the hammer with gate open. Just modify the transfer bar per their instructions or also buy their modified bar. The Transfer bar can easily be eliminated with this option; just grind off the top shelf on the hammer face.

Or you can buy the PC 'Registered' old model hammer with safety notch to get the 4th click since you don't want the transfer bar. But you won't need to buy any of their parts if you use an original old model hammer and modify your trigger.

2. A Uberti or similar clone can be beefed up for spring reliability with the addition of a wire trigger/cyl latch spring. And by drilling one hole in the frame, substituting the Ruger hand coil spring and pliunger for the hand leaf spring.

3. The most challenging option is to convert your New Vaquero to a three screw design. This I have done and there are several variations from keeping the transfer bar (which I know you don't want) or not, all the way to a completely authentic 3 screw Ruger. I have step-by-step instructions if you're interested in this option.

4. With any of the options above, there's two additional modifications that are a must for fanning: a cyl latch support block and a hammer travel stop. But both are rather simple to add.

I hope this is helpful. Just ask if you want more detail or have questions.
 

jmar

Bearcat
Joined
Sep 26, 2016
Messages
47
Hondo44 said:
jmar,

All good questions! There are several options here to cover, all of which I've done at least once:

1. Power Custom ½ cock hammer (with their modified trigger or modify yours) would be the easiest approach, although you'll only have 3 clicks, not four, the loading gate will be freed up so you can cock the hammer with gate open. Just modify the transfer bar per their instructions or also buy their modified bar. The Transfer bar can easily be eliminated with this option; just grind off the top shelf on the hammer face.

Or you can buy the PC 'Registered' old model hammer with safety notch to get the 4th click since you don't want the transfer bar. But you won't need to buy any of their parts if you use an original old model hammer and modify your trigger.

2. A Uberti or similar clone can be beefed up for spring reliability with the addition of a wire trigger/cyl latch spring. And by drilling one hole in the frame, substituting the Ruger hand coil spring and pliunger for the hand leaf spring.

3. The most challenging option is to convert your New Vaquero to a three screw design. This I have done and there are several variations from keeping the transfer bar (which I know you don't want) or not, all the way to a completely authentic 3 screw Ruger. I have step-by-step instructions if you're interested in this option.

4. With any of the options above, there's two additional modifications that are a must for fanning: a cyl latch support block and a hammer travel stop. But both are rather simple to add.

I hope this is helpful. Just ask if you want more detail or have questions.
Hondo your replies are gold, i'm very thankful for all the help you're giving me.

I probably won't go with the Power Custom ½ cock hammer, reason being it's still designed for the transferbar so the hammer has those steps rather than the smooth face that i find aesthetically pleasing. Also it wouldn't be much of a project, and i really enjoy the project part. So we can rule that out.

Now the Old Model style hammer they offer seems like it might work, i'm slightly confused though can you go into detail on what mods i'd need to do to fit it? Also would that hammer be the only part i need? And are you saying that's it's just the same as a Factory OM hammer, seems like one of those would be much cheaper.

And yes i would absolutely love the guide on the full OM conversion, i was just looking at my Vaquero today and i just realized it had no screws in the frame! Then i watched a Youtube video on how to dissamble it and it's completely different than the revovlers i'm used to. I'm a huge proponent for simplicity which is why i love the 3 screws. That would definitely be my choice if i can handle it.

And one last question for now, i've already started my search for a base gun for this project. I wont be using my current Vaquero since it's a 5½ and in to good of shape. If you know, the question is how to tell if a NMV has a gripframe lock? Like is there a certain serial number range or something? Thanks
 

DPris

Buckeye
Joined
Dec 20, 2003
Messages
1,343
I think you'd be in over your head trying to do what you want yourself.
And the best way to tell if a Ruger has an internal lock is to remove the grip panels & look for one.
Denis
 

CraigC

Hawkeye
Joined
May 27, 2002
Messages
5,197
Location
West Tennessee
Hondo44 said:
1. Power Custom ½ cock hammer (with their modified trigger or modify yours) would be the easiest approach, although you'll only have 3 clicks, not four, the loading gate will be freed up so you can cock the hammer with gate open.
You can't cock the hammer with the gate open. You have to cock the hammer first, then open the gate. If you open the gate first, it operates like a normal New Model action.
 

Hondo44

Hawkeye
Joined
Apr 3, 2009
Messages
8,051
Location
People's Republik of California
Hondo your replies are gold, i'm very thankful for all the help you're giving me.

I probably won't go with the Power Custom ½ cock hammer, reason being it's still designed for the transferbar so the hammer has those steps rather than the smooth face that i find aesthetically pleasing. Also it wouldn't be much of a project, and i really enjoy the project part. So we can rule that out.

Now the Old Model style hammer they offer seems like it might work, i'm slightly confused though can you go into detail on what mods i'd need to do to fit it? Also would that hammer be the only part i need? And are you saying that's it's just the same as a Factory OM hammer, seems like one of those would be much cheaper.

And yes i would absolutely love the guide on the full OM conversion, i was just looking at my Vaquero today and i just realized it had no screws in the frame! Then i watched a Youtube video on how to dissamble it and it's completely different than the revovlers i'm used to. I'm a huge proponent for simplicity which is why i love the 3 screws. That would definitely be my choice if i can handle it.

And one last question for now, i've already started my search for a base gun for this project. I wont be using my current Vaquero since it's a 5½ and in to good of shape. If you know, the question is how to tell if a NMV has a gripframe lock? Like is there a certain serial number range or something? Thanks[/quote]

jmar,

You're very welcome, happy to help.

1. To use the PC 1/2 cock hammer, the very thick Ruger trigger sear must be thinned down from the front side (like an old model Ruger trigger). The rear corner of the trigger, which is the actual sear is not touched. That's why PC sells the modified trigger, but it's so easy to do, it's not worth the cost IMO.
The 1/2 cock hammer can be used with or w/o the transfer bar. But w/o the transfer bar the front face of the hammer must be flattened to look like an OM hammer; just grind or file off the top step to make a flat face.

2. Using the PC registered hammer, the PC Bisley hammer for old models, or an original OM hammer is almost the same. None can be used with a transfer bar because they have the flat face. All three need the trigger modification as described above to fit in the 1/2 cock notch (or safety and 1/2 cock notch of the PC om Bisley and original old model hammer.)

To use the PC Bisley hammer 'for old models' or an original OM hammer, there's two additional modifications required:
1. Shim the screw hole, because the OM screw is slightly larger than the NM pin. And that's simple: take a 22 case with bullet and powder removed and primer fired which is just the right size, (a fired 22 shell won't work because it's expanded), press it into the OM hammer screw hole in a vise, and cut the case off flush on both sides. Debur the edges and clean out with a 22 bore brush. Now the NM hammer pin will fit perfectly.
2. Cut the transfer bar connecting boos off of the trigger to clear the hammer bases.


With any of these hammer options, I cut off the shaft protruding from the cyl latch and the loading gate will be freed up so you can cock the hammer with gate open. That's my contribution. Craig's comment is limited to his knowledge of just the Power Customs 1/2 cock hammer instructions which results in: the 1/2 cock hammer can only be cocked if done before the gate is open w/o my latch modification.

3. Yes, the NMV w/o lock has a 512 serial # prefix. 510 & 511 have locks.

4. This is a project. Not really difficult, just might sound that way.

Most authentic conversion from a NM to 3 screw Old Model, with four hammer 'clicks' (also with or w/o transfer bar safety), but with the transfer bar there is no interaction with the loading gate or the cyl latch. Loading/unloading is strictly the OM way by ½ cocking the hammer. Therefore chambers always align properly with the loading gate trough.

Here it is step by step:

You'll need the following OM action parts or optional parts: hammer or one of those mentioned below under hammer options*, cyl latch, latch spring, Colt 3rd generation hammer screw .220" x 28. Note: A disassembled old model for reference and measurements is a must.

Note: on stainless conversions: Every internal part won't be stainless; the OM parts, such as the cyl bolt, loading gate detent screw and plunger, trigger return plunger and possibly hammer depending on the option chosen above. But all the springs will be 'cause they always were.

TO START: Gut all internal parts from a NM SA and put them aside except the trigger, cylinder pawl and cylinder base pin.

*Hammer options:
1. A carbon steel OM hammer with a polished or brushed finish (if you want to look like stainless) or Powers Custom three screw Bisley OM hammer replacement (not stainless either). Hammer face modification to form a step is needed on both if the transfer bar safety IS retained. And the hammer base must be relieved on the right side to match the original NM hammer for transfer bar and trigger boss clearance.

2. Powers Custom stainless NM half cock standard or NM Montado/Super half cock hammer. Hammer nose modification needed if transfer bar safety is NOT retained. The safety notch is useless anyway but a small shelf can be added at the right location for the "click". Enlarge hammer assembly pin hole in base to fit the OM screw.

Tap hammer pin hole in left side frame to .220" x 24 threads and enlarge hammer pin hole in right side frame for clearance and counter bore for the hammer cap screw.

Trigger options:
The NM trigger/cyl bolt pin hole in frame does not align with either of the OM trigger or bolt screw holes. The trigger/cyl bolt pin hole must be tapped on left frame side and counter-bored on right side for the cap of a machine screw* to use with the NM trigger.

NM trigger is modified by grinding the spring perch web off the back for use with an OM return spring and plunger an Old Army stainless grip frame, (note: it's an XR3-RED size). Any NM grip frame can be used with its standard trigger return spring by not grinding off the trigger spring perch web. Or by making the well known adapter** and OM spring and plunger for the true OM look.

Also cut off the transfer bar boss (unless transfer bar is retained. If retained, the lower right side of the OM hammer will need to be relieved to match the relief cut in the NM hammer.)

The NM trigger stop at the top area must be removed for clearance of the added OM cyl bolt screw.

And the NM trigger sear must be thinned to fit the OM hammer notches or the Power Custom ½ cock hammer, exactly like the Power Custom trigger they supply for their ½ cock hammer or buy the NM Power Custom trigger with already modified trigger sear.

Trigger return spring options:
1. OM trigger plunger/spring with a trigger spring adapter to use the existing NM grip frame.
2. replace grip frame with Ruger Old Army Stainless 'KXR-3' with wide trigger slot and provision for trigger return spring/plunger.
3. Retain NM trigger spring.

To be completely authentic by using an OM narrow (there's no steel OM grip frames with narrow trigger slot) or SBH wide trigger:
The trigger/cyl bolt pin hole must be plugged with two oversize pins, 'peen blended' and polished over flat. Then a new 8 x36 trigger screw hole drilled and tapped*.

Cylinder bolt:
Locate, drill, counter-bore and thread 8-36* a new cyl bolt screw hole in the old model location. Use an old model cylinder latch (stop bolt) and return spring. Drill small hole inside frame to capture end of the above return spring.

Loading gate:
Use OM gate and polish bright for a SS gun. Or existing NM loading gate can be modified to the OM gate style with two flats for the open and closed detents. Grind off the half round protrusion at the back end of gate shaft to disengage from transfer bar if the bar is retained. In either case, drill and tap hole in the bottom of the frame for an old model style gate plunger, spring and set screw.

Cylinder base pin:
You can use the SS cyl pin with the plunger in the end or remove plunger. Or use OM carbon steel pin polished bright.

* Details for the action screws:

Hammer screw option - Make a fake screw/hammer pin, from a large enough screw to remove threads and end up with a shank the size of the pin .202" and a slotted cap the size of the OM hammer screw cap.

Trigger screw – the existing NM trigger pin hole is perfectly sized to tap on left frame side for a stainless 8x36 machine screw which you can buy. Slight dressing down of the threads will allow it to fit thru the NM trigger hole.
Cyl Bolt screw – same as Use the factory OM screw. Drill and thread hole 8x36 for it.

Turn down the 8x36 screw caps of the trigger and cyl bolt screws a little smaller than the two original OM 8x36 screws and they won't look too close together at first glance. Drill the right side frame holes to fit the screw caps.

Locating and Drilling 3rd screw hole in frame:
I measured with the screws in the holes and the screw slots perpendicular to my line of measurement. It's easier to judge the center of the hole that way, as long as the screw slot is cut in the center of the screw cap!

The cyl latch screw hole ctr is .877" from the ctr of the hammer screw hole. And it's .185" from the ctr of the cyl latch screw to the bottom of the cyl window. Scribe a line for each measurement and center punch where they cross for the ctr of the new hole to be drilled. I always start a precise hole with a 1/16" center drill to enlarge the punch dot. Then follow with a little larger pilot drill all the way thru the work. Then the final tap size hole. I use 'gun taps' (2 flutes). The trickiest part is clamping the tapered frame so the hole goes thru at a right angle to the frame ctr line.

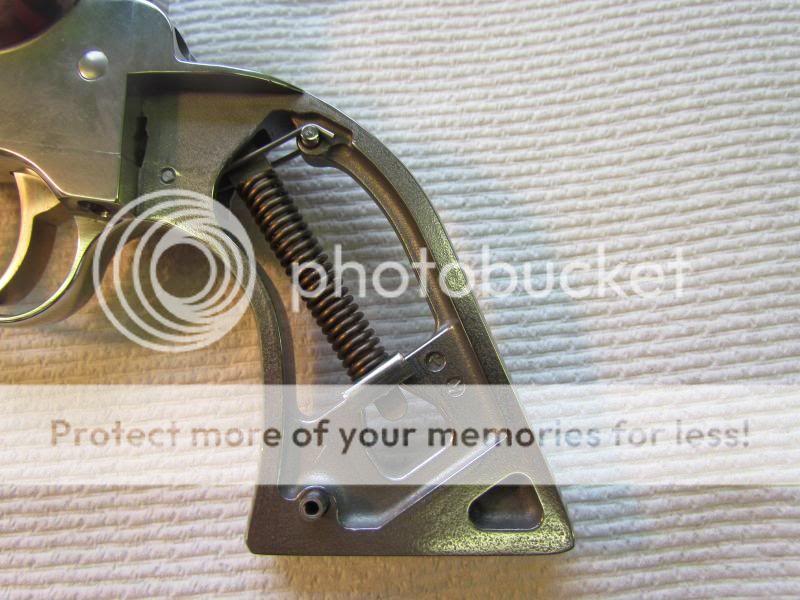
**You can make the simple aluminum adapter below to fit in the NM GF behind the old model trigger or just use a .22 LR case to hold the return spring and plunger in place. Either will need the one NM trigger return spring retaining pin closest to the trigger shown below 2nd photo, to hold your OM trigger return spring/plunger adapter or .22 case in place. File a small notch in the .22 case head to nest on the retaining pin.
orig.jpg

IMG_1399_zps09554883.jpg
 

CraigC

Hawkeye
Joined
May 27, 2002
Messages
5,197
Location
West Tennessee
Hondo44 said:
Craig's comment is limited to his knowledge of just the Power Customs 1/2 cock hammer instructions which results in: the 1/2 cock hammer can only be cocked if done before the gate is open w/o my latch modification.
No, my comment is "limited" to my experience in installing the PC half cock hammer/trigger kit and using it.

And I hope you understand that the OP is probably a teenager. Definitely not someone who needs to be going through your tutorial with file in hand. :roll:
 

BlkHawk73

Hunter
Joined
Dec 30, 1999
Messages
4,459
Location
Maine
Maybe I'm reading into things a bit. Seems to need it to handle "general shooting, shooting hot loads, dry fanning, quickdraw, twirling, and sitting at my desk playing with it all day" yet you're after a New Vaquero? Umm, you do realize these are on the medium frame and not for those hot "Ruger only" loads, right? Anything below that level, within SAAMI specs and you'd be ok. The quickdraw and twirling actions...well, I'm sure even the lowest level SA will withstand that. ;)
 

jmar

Bearcat
Joined
Sep 26, 2016
Messages
47
Alright Hondo i think i get most of it, thanks very much! I'll start my parts and gun search then let you know, i'll probably have a few questions as the project goes on and i'll just post them in this thread. Might stop at a few gun stores today even!
 

jmar

Bearcat
Joined
Sep 26, 2016
Messages
47
CraigC said:
Hondo44 said:
Craig's comment is limited to his knowledge of just the Power Customs 1/2 cock hammer instructions which results in: the 1/2 cock hammer can only be cocked if done before the gate is open w/o my latch modification.
No, my comment is "limited" to my experience in installing the PC half cock hammer/trigger kit and using it.

And I hope you understand that the OP is probably a teenager. Definitely not someone who needs to be going through your tutorial with file in hand. :roll:
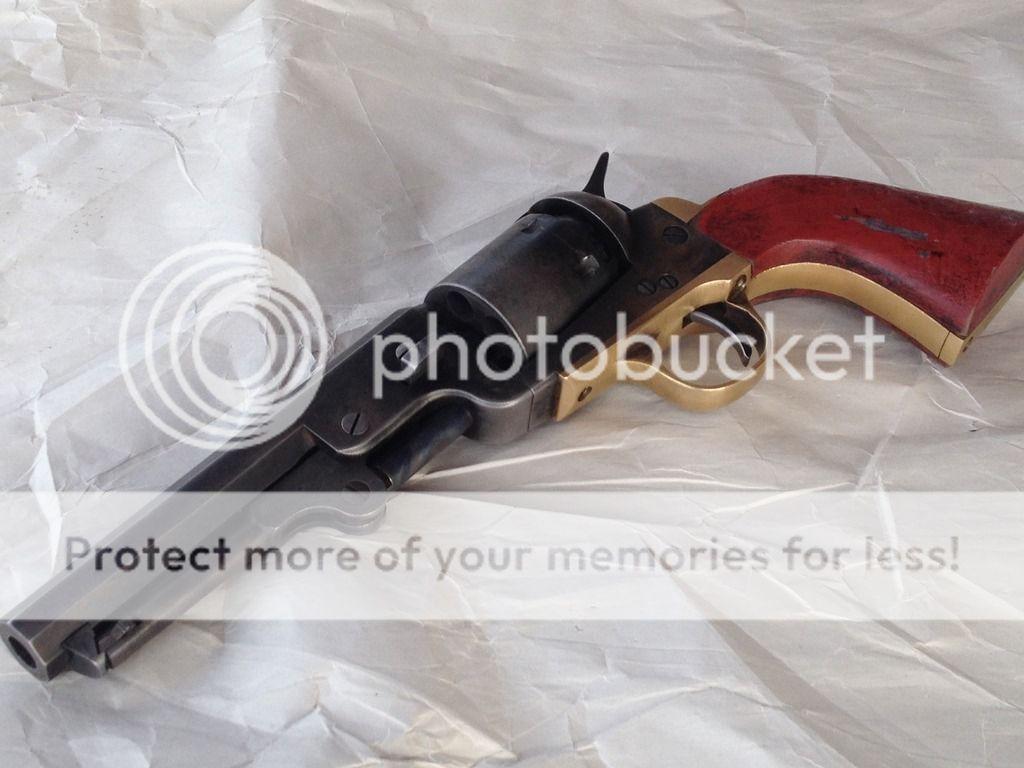
While i'm no gunsmith or machinist i can manage. Here is a custom 1851 Navy i recently finished. Work done: Shortened barrel from 7 ½ to 5 ½ . Shortened loading lever. Loading lever required inches of precise boring, and two very delicate small tracks for lever latch. I had to cut a dovetail in the barrel for the lever catch. It has a custom Lemat style hammer for fast thumbing. Full defarbing. lightened mainspring. And artifical ageing. All that on top of starting with a very very rough kit with bad tolerances.

While it's not that impressive i'm am always trying to improve my gunsmithing skills, and the best way to do that is to challenge yourself. I don't see the issue?

CLICK FOR FULL ALMBUM OF BEFORE AND AFTER: http://s350.photobucket.com/user/jmarpics/library/Custom%20Colt%201851%20Navy
 
Top