A Cub Update

Joined
Sep 1, 2003
Messages
8,265
City & State/Province
Richmond Texas USA
Hey Guys,
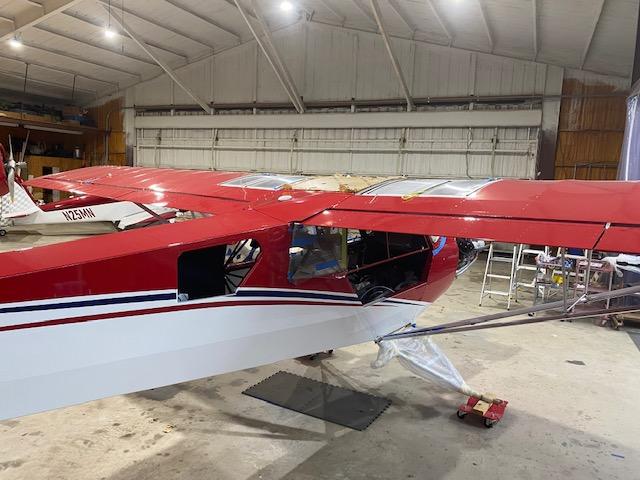
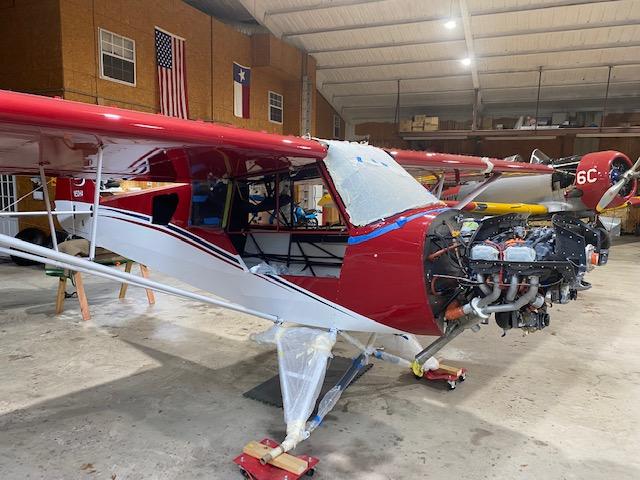
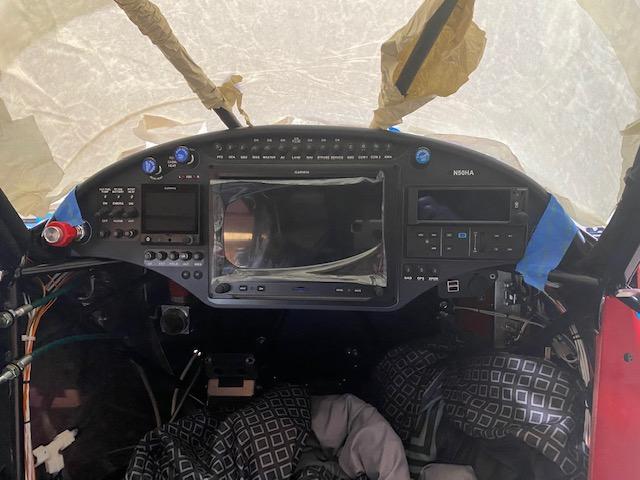
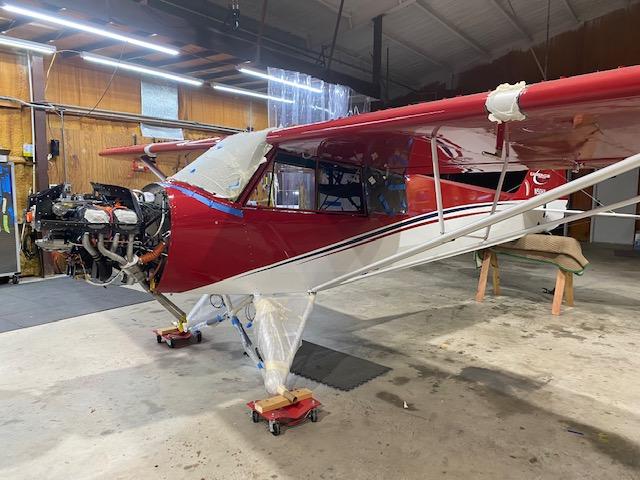
I thought it was about time for an update on the Carbon Cub. I spent 3 weeks at Son Trey's house over Christmas. As you can see we got quite a bit done. The Cub is starting to look like a real Flying Machine. We installed the wings, flaps, ailerons, and the big pain the the fitting of the windshield. A bunch of small items that take forever to do and when finished it looks like nothing was done.
Most of the final finishing items SHOULD go fairly easy..
As the little doggie said when it got it's tail caught in the door" It won't be long now" :)

Since it is painted Red White and Blue like all of our planes the name for this one is "Patriot" That way if things don't work out the way it should. It will become known as "Traitor"
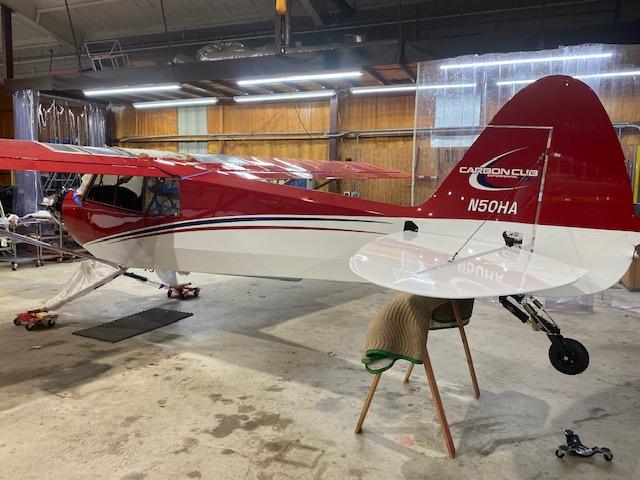
1674528292582.jpeg


1674528347331.jpeg

1674528408625.jpeg


1674528488474.jpeg

1674528555961.jpeg
 
Looks awesome! Do you buy everything in a kit form, or just figure out which pieces will fit and buy them separately?

Then once it’s all done, how do you test it before flying? Know what I mean? Like how do you know it’s airworthy without risking a crash?

Really cool though. Great job!
 
As an Amazon Associate we earn from qualifying purchases. Product prices and availability are accurate as of the date/time indicated and are subject to change.
Dave P
"What makes the windshield so much fun?"
I will try and explain what goes into installing this POS windshield and will probably forget some stuff. :)
First after drilling the holes and painting you position the mounting strip /MS that you see next to the blue tape onto the boot cowl. When you think it is in the correct position then drill holes into the boot cowl /BC and temporarily attach the MS to the BC Now you are ready to fit the oversize windshield/WS by putting it on the BC without the MS on so you can see the drilled holes in the BC and the ones in the side post and on top of the airplane frame. In the picture you can see the side frame screws.
Now that you have pushed and pulled the WS into place you mark where you want to cut the WS with the die grinder with a thin cut off wheel on it to fit the MS. This will take at least 4-5 fittings. Remember measure twice cut once WS is high$$$. OK WS fits MS now mark to be able to cut for fit of top and side frames. Next we mark and drill the PILOT holes in the top and sides. Then drill oversize and camphor the holes. Temporally put WS back in and check for fit must fit in WS tight. Success it fits now you can take everything apart to allow you to drill larger holes and install threaded inserts/Rivnuts into the BC for the #6 screws that attaches the MS. Install 2 sided tape to the MS and install the WS then remove 1 screw at a time to allow you to pull off backing of 2 sided tape. NOW we can fit the SKYLIGHT at the top and install screws on side post and top.
If you are lucky this only takes 3-4 days and you don't need to order a new windshield or drilling a hole in the wrong place from being stooopid. :)


1674587912538.jpeg


"Looks awesome! Do you buy everything in a kit form, or just figure out which pieces will fit and buy them separately?

Then once it's all done, how do you test it before flying? Know what I mean? Like how do you know it's airworthy without risking a crash?"

Kevin,
This EX-3 Carbon Cub comes in a kit with MOST all parts to assemble. BUT you still have to fabric cover and paint all of the parts. Another BIG PITA but Trey and I enjoy doing it when stuff goes right:) Sometimes the impossible just takes a little longer and to show the non believers it can be done.:)

The flight testing begins after you get your two size extra large big balls on. Climb in fire that baby up and see if it will fly.

Really most of the similar homebuilts have flown in the past and will fly you just don't know how well. You and others spend quite a bit of time looking at all of the important parts. If the engine keeps making loud noise most of the time all goes well.


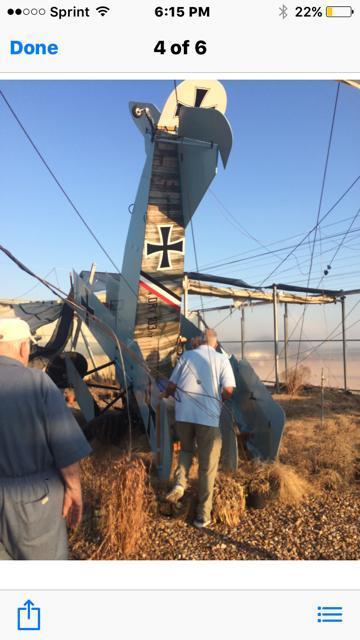
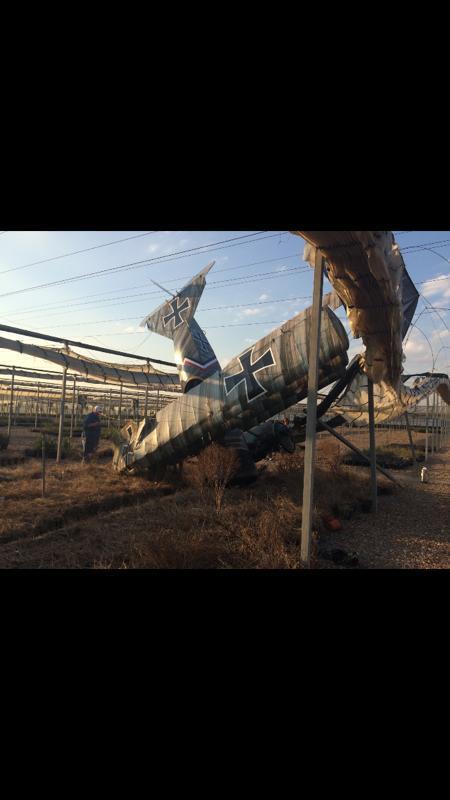
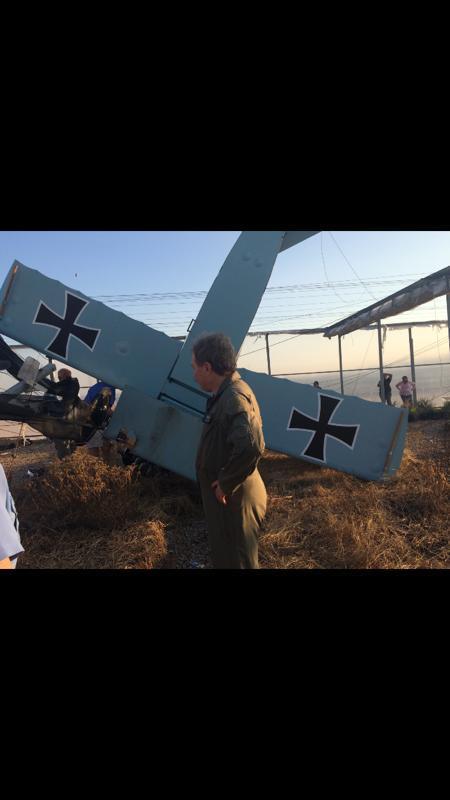
This is what happened to my neighbors DR-1 Tri-Plane. This was on the first flight and due to engine failure and the pilot, not the neighbor, having his head where the sun don't shine. A real shame6 years or so down the crapper and $150K+- along with it. It was also an outstanding build
1674587717487.jpeg


1674587667326.jpeg


1674585443383.jpeg

"
 
Looks pretty darn good, Jim. I am really airplane stupid, but is that a 4 cylinder engine w/4 valves per cylinder or an 8 cylinder? I also second Kevin's question, who flies it first? How do you know it is 100%?
Turd,
It is a 4 cylinder and fuel injected with 2 valves per cyl. which makes about 200HP on 360 CI

Trey will fly this one first. The other EX-2 Carbon Cub we did Chad flew it First. I flew my Starduster Too on it's first flight in 1973.

Chad and first flight 2019
IMG_6178_zpshfxhoafh.jpg
 
I've always wanted to fly and I knew I would have to build anything I could afford like everything else I have. So far I've been sidetracked with cars, trucks, bikes, guns and boats. All 40 years worth still less than 1 plane. I've seen hovercraft with wings that can cruise 20' or so off the ground. I might have to settle for that.
 
So basically a good deal of care and patience, don't skip the double checks and the POS windshield almost installs itself.
Remember, you're spending quality time with your family.
Look at the bright side, at least you don't have to heat mold it from a flat sheet.
I think I'd take fiddling with the windshield over the paint work any day.
Here's to a completely boring first flight.
Looking good, is it sold yet?
 
Dang that looks nice.
I assume it is an EX? How man hours do ya'll have in it so far?
jimbo,
Sorry I didn't answer sooner. The factory says 1000 hours to complete one. We don't keep track but I'm sure it takes us longer. We must work slower than the rest of the builders. :)
I didn't keep track on my Starduster but the avg. is probably 3500-4000 hours.

Dave,
Son wants to keep and fly this one awhile before it goes on the market. Probably depends on when he gets another project.
 
Dave,
Son wants to keep and fly this one awhile before it goes on the market. Probably depends on when he gets another project.
I thought maybe you already had another kit coming and were going into production. Have a sign painted on the hanger...


The Triple H
Flying Machine Factory
" We bleed and swear so you don't have to! "
 
Beautiful project. I have a lot of respect for your talents. I really know nothing about aircraft but I will throw in one thing that I found very interesting.

When I worked in an aircraft job shop, the boss had a whole H86 sitting in his back yard, minus the engine. Anyway I was comparing a flap contour that we were making to one on that plane. I found that the wing and tail flaps if that's what you call them were perfectly balanced. They had a small counter weight on the other side of the hinge so that if you pushed the flap up or down, it would always go right back to aligning with the wing. Cool stuff.
 
Cary,
Quite a few planes will have the tail flap(elevator) and ailerons balanced like you describe. This allows for less stick pressure (along with other stuff) required by the pilot. The balance is done by having the weight forward of the hinge point/pins. It also helps eliminate flutter of the controls which can destroy the plane. In the 60s I was at a fly-in and saw a guy killed in a homebuilt due to aileron flutter which tore off the aileron and caused the plane to crash.
Early P-38s had a elevator buffet problems because of this. This kept them form diving at high speeds and allowed the enemy to escape. Later models had a dive flap added and a larger balance weight as you described added. With these modifications a lot of Germans got surprised in a dive when the 38 caught them.:-)
 
Cary,
Quite a few planes will have the tail flap(elevator) and ailerons balanced like you describe. This allows for less stick pressure (along with other stuff) required by the pilot. The balance is done by having the weight forward of the hinge point/pins. It also helps eliminate flutter of the controls which can destroy the plane. In the 60s I was at a fly-in and saw a guy killed in a homebuilt due to aileron flutter which tore off the aileron and caused the plane to crash.
Early P-38s had a elevator buffet problems because of this. This kept them form diving at high speeds and allowed the enemy to escape. Later models had a dive flap added and a larger balance weight as you described added. With these modifications a lot of Germans got surprised in a dive when the 38 caught them.:)
Thank you Jim.
 
Back
Top