Hey Guys,
Since quite a few of you enjoyed the post of the refurbishing of the "Mighty Mouse" Camaro. I thought I would post about my refurbishing of my 1961 "P" Model Beechcraft Bonanza.
So lets start with a little history. Along about 19 and 64 I realized the only way I was going to be able to have an airplane hobby was to find older planes that needed a lot of TLC to fix and sell. So this has been my first love since that first Aeronca Champ I bought and rebuilt in 1966/67. I had ten hrs of flight time when I bought it. After enjoying flying it for 2 years and 6 months of rebuilding it was time to sell it and find a better plane to rebuild, and so on and so on. Well in 1989 I had just sold a Cessna Cardinal that I had redone and made a few bucks on. So time to upgrade to another that needed some TLC. I found this Bonanza that the owner had to sell to pay his taxes. HMMMMMMMMMM I'm liking this. Oh by the way he is a lawyer that didn't win on this one.
The plane's airframe was in good shape with low total hours, but needed an engine overhauled soon and updated paint, interior, new glass, and other small items. Not to many buyers out there for one like this. If the work has to be farmed out it is better to go buy one already done.
Son and I flew the plane for 3 years then he was transferred to Norfolk and I decided it was time to do my thing. So for the next 6 months it was go to the hangar after work and weekends, yea I was still working at the time, and get after it. Yea I love taking old crap and making it new again. Well I'm not to wild about stripping off the old paint, but it has to be done for a good paint job. It still had the factory paint with one more new coat on top of it. What a pain in the arsh that is to remove. You buy paint remover and lacquer thinner in 5 gal cans and lots of it. You just haven't lived until you have stripped the belly and bottom of the wings of an airplane. Well maybe you have so skip that part and trust me on that.
OK Lets stop with the BS and get on with the pictures and project.
This is what it looked like in 1961 with that Turquoise Paint that was so popular at the time YUCK. Remember the Fords and Chevys of that time period???

Getting off some of the last paint.

OK Now the old paint is gone and ready to install new windows

New glass and ready to go to paint. Notice all the controls, gear doors, and all the parts that can be taken off have been. Now I will acid etch, alyodyne, wash primer, epoxy prime, then urethane paint.
Well that didn't take long. Lets pull off the tape and paper. By the way I used 25 rolls of 3/4" tape and 2 rolls of 2''. There are 4 different colors used. Main colors are Red, White and Blue. plus Silver inside of gear doors cowling and gear plus grey in the interior. This was the hardest paint scheme I have ever taped. Because everything tapers or is rounded and doesn't line up with the rivet lines.

Now It's time to paint all the interior so we can get rid of the 50s color and install the new leather interior. I had the local hot rod guy do the seats and side panels but I cut and mounted the panels and head liner and other stuff.


Hey WHO stole my Eng.????
Missing a few of the big parts

Oh Crap I hope I can remember where all this stuff goes.

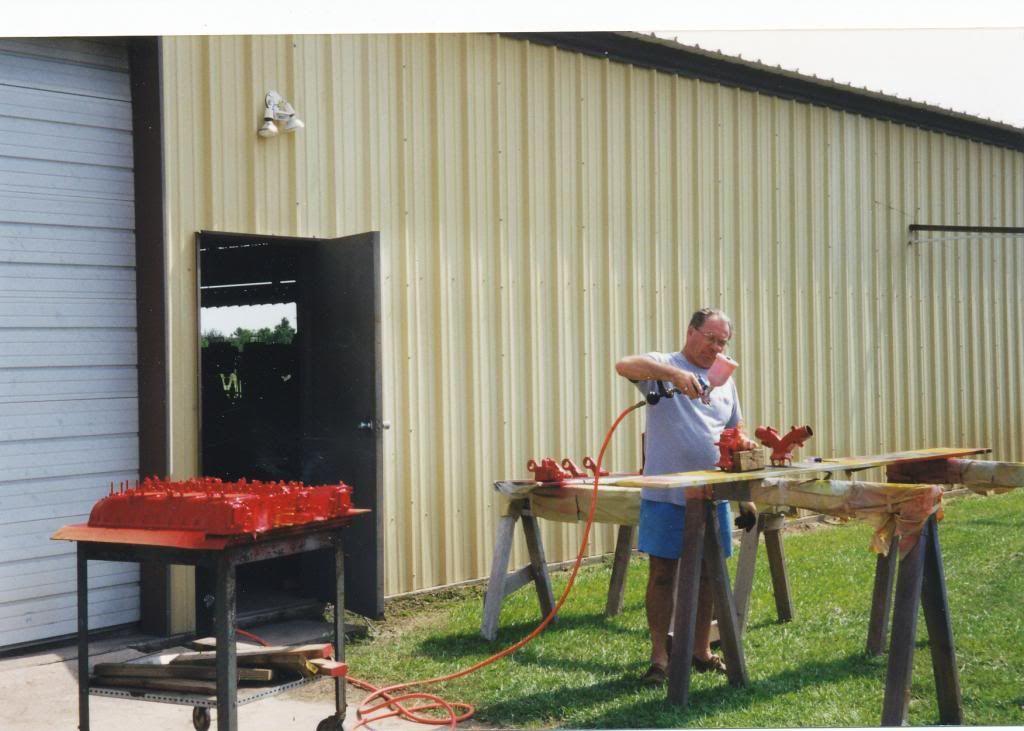
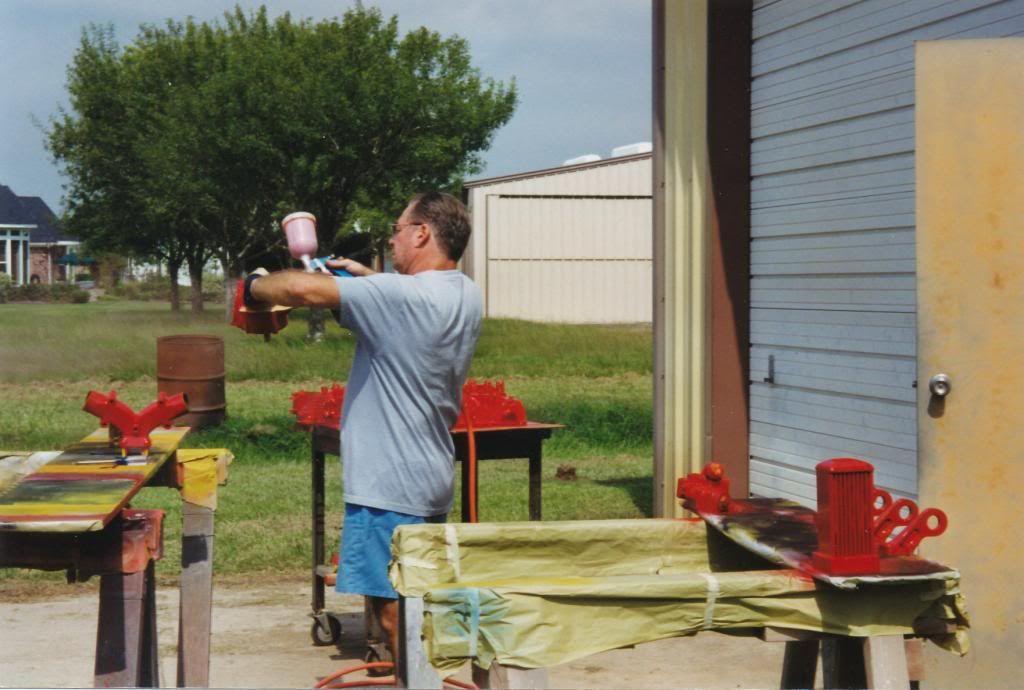
Doing a little painting of eng parts
Well I had to call in help to get it back together Mech in training

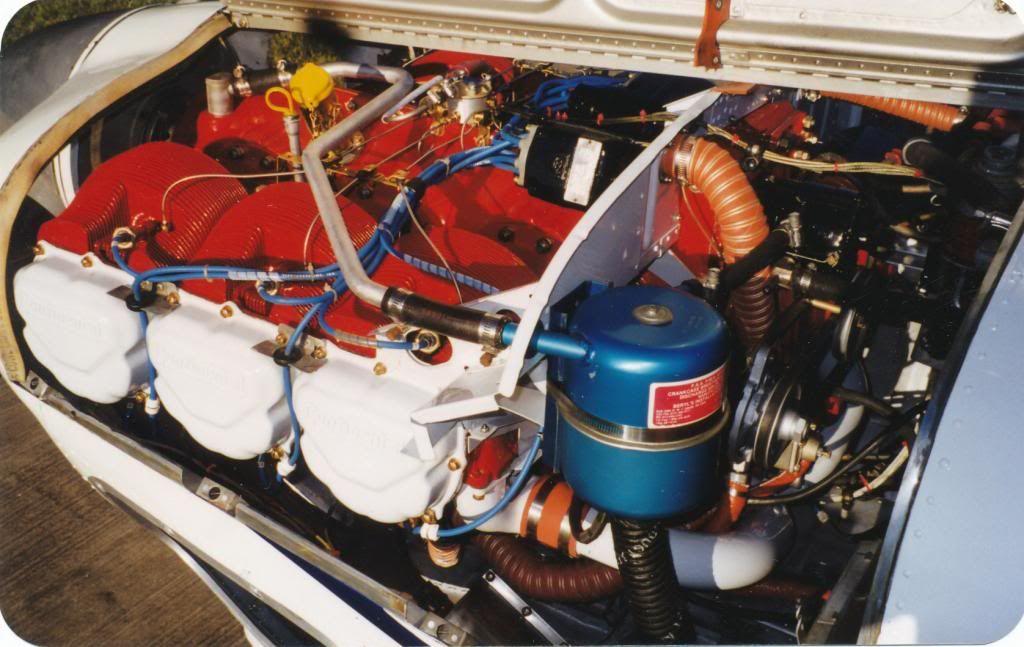
Looks like most all the big parts are back on.

Well I guess all the stuff fits.
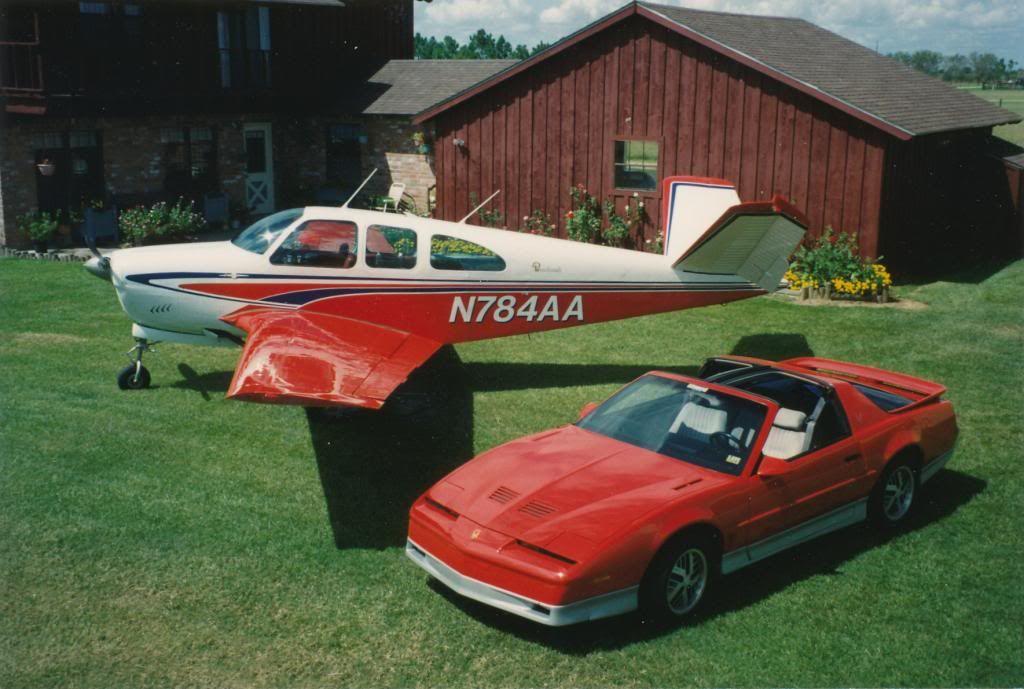
Well here is the finished project. Notice the red is the same as on the Trans Am. That is the only color Red that I now use on Cars and planes.
It took me 25 years of buying rebuilding and selling to come up with the BEST single engine airplane ever built so I have stopped on selling. This is the one I will die with.
I hope I didn't bore you to much. If any interest in this I will post the building of a Two Winger :wink: :wink: :wink:

Since quite a few of you enjoyed the post of the refurbishing of the "Mighty Mouse" Camaro. I thought I would post about my refurbishing of my 1961 "P" Model Beechcraft Bonanza.
So lets start with a little history. Along about 19 and 64 I realized the only way I was going to be able to have an airplane hobby was to find older planes that needed a lot of TLC to fix and sell. So this has been my first love since that first Aeronca Champ I bought and rebuilt in 1966/67. I had ten hrs of flight time when I bought it. After enjoying flying it for 2 years and 6 months of rebuilding it was time to sell it and find a better plane to rebuild, and so on and so on. Well in 1989 I had just sold a Cessna Cardinal that I had redone and made a few bucks on. So time to upgrade to another that needed some TLC. I found this Bonanza that the owner had to sell to pay his taxes. HMMMMMMMMMM I'm liking this. Oh by the way he is a lawyer that didn't win on this one.
The plane's airframe was in good shape with low total hours, but needed an engine overhauled soon and updated paint, interior, new glass, and other small items. Not to many buyers out there for one like this. If the work has to be farmed out it is better to go buy one already done.
Son and I flew the plane for 3 years then he was transferred to Norfolk and I decided it was time to do my thing. So for the next 6 months it was go to the hangar after work and weekends, yea I was still working at the time, and get after it. Yea I love taking old crap and making it new again. Well I'm not to wild about stripping off the old paint, but it has to be done for a good paint job. It still had the factory paint with one more new coat on top of it. What a pain in the arsh that is to remove. You buy paint remover and lacquer thinner in 5 gal cans and lots of it. You just haven't lived until you have stripped the belly and bottom of the wings of an airplane. Well maybe you have so skip that part and trust me on that.
OK Lets stop with the BS and get on with the pictures and project.
This is what it looked like in 1961 with that Turquoise Paint that was so popular at the time YUCK. Remember the Fords and Chevys of that time period???

Getting off some of the last paint.

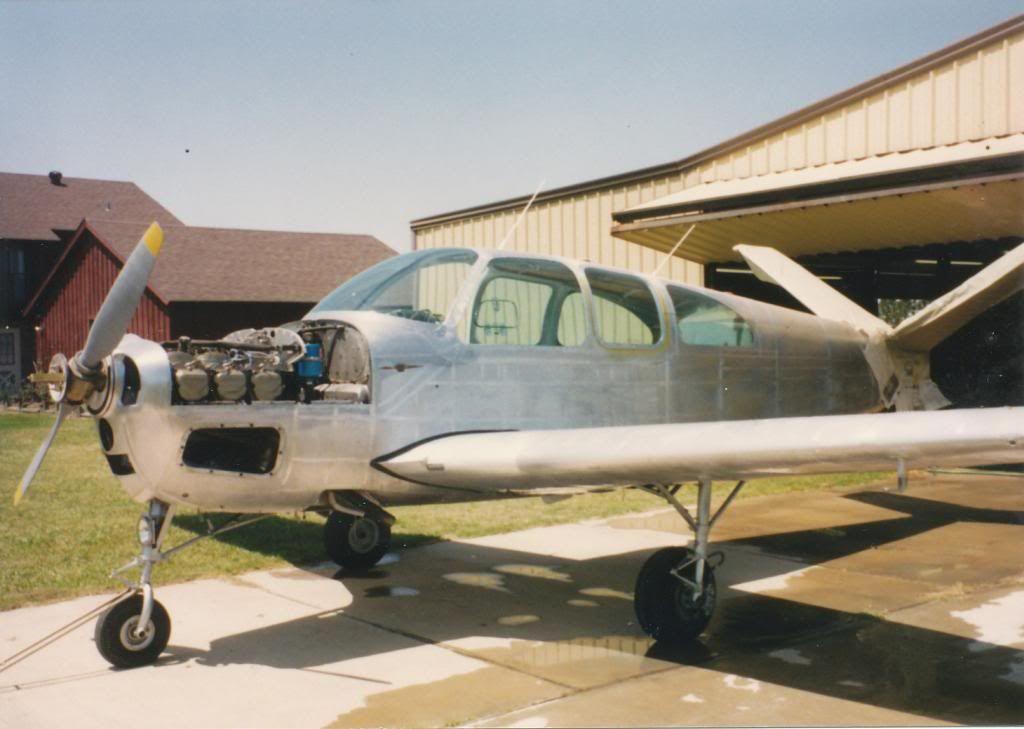
OK Now the old paint is gone and ready to install new windows

New glass and ready to go to paint. Notice all the controls, gear doors, and all the parts that can be taken off have been. Now I will acid etch, alyodyne, wash primer, epoxy prime, then urethane paint.

Well that didn't take long. Lets pull off the tape and paper. By the way I used 25 rolls of 3/4" tape and 2 rolls of 2''. There are 4 different colors used. Main colors are Red, White and Blue. plus Silver inside of gear doors cowling and gear plus grey in the interior. This was the hardest paint scheme I have ever taped. Because everything tapers or is rounded and doesn't line up with the rivet lines.

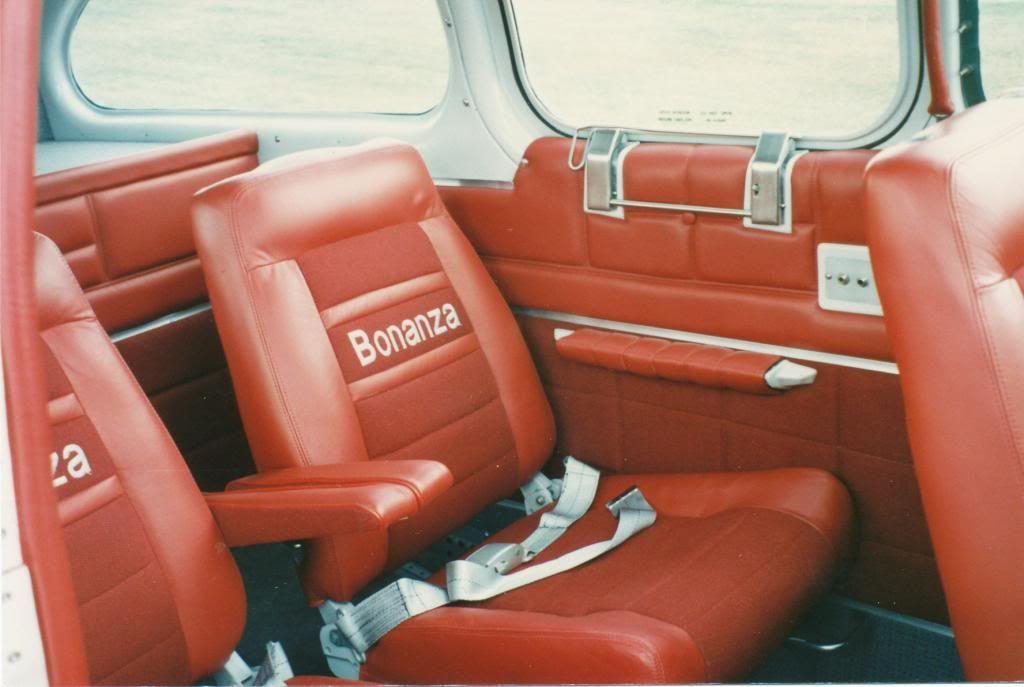
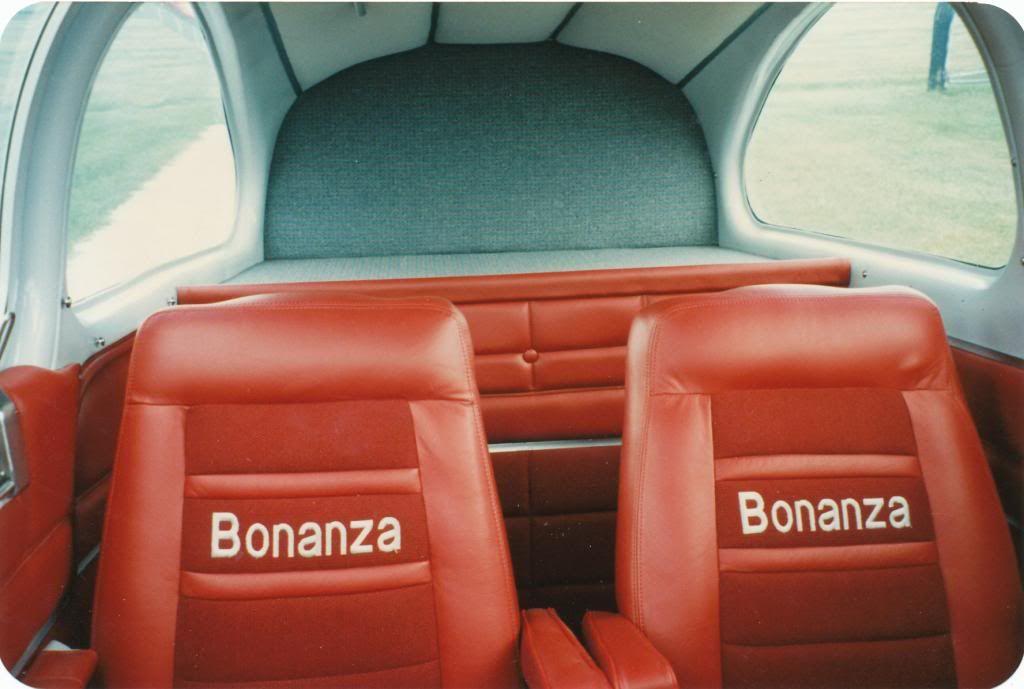
Now It's time to paint all the interior so we can get rid of the 50s color and install the new leather interior. I had the local hot rod guy do the seats and side panels but I cut and mounted the panels and head liner and other stuff.


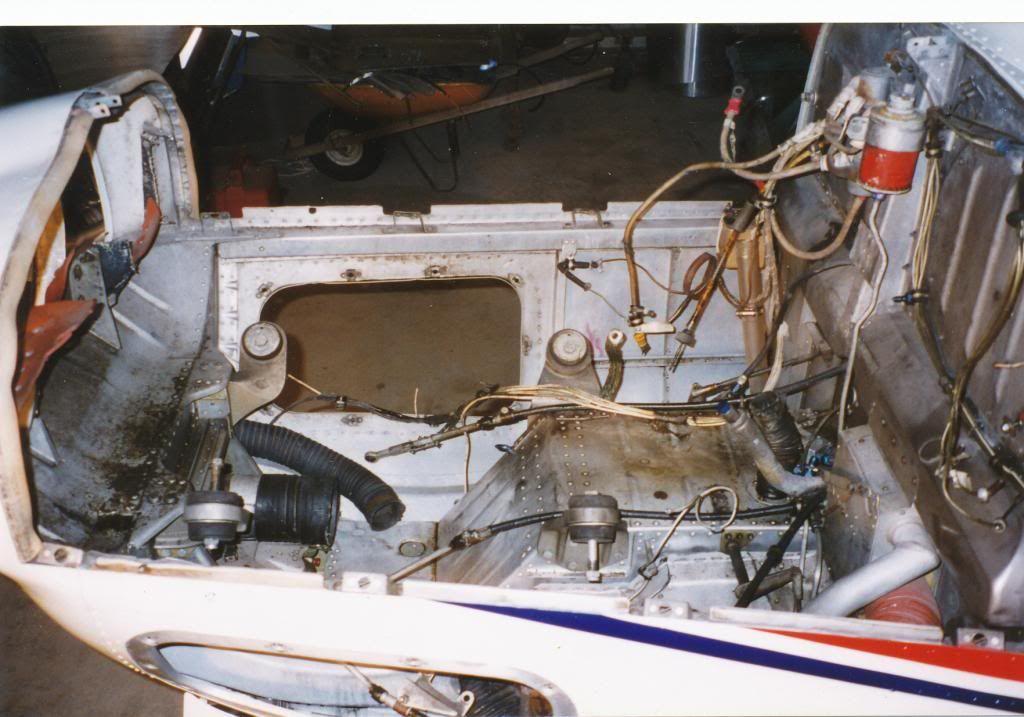
Hey WHO stole my Eng.????

Missing a few of the big parts

Oh Crap I hope I can remember where all this stuff goes.

Doing a little painting of eng parts


Well I had to call in help to get it back together Mech in training

Looks like most all the big parts are back on.

Well I guess all the stuff fits.

Well here is the finished project. Notice the red is the same as on the Trans Am. That is the only color Red that I now use on Cars and planes.
It took me 25 years of buying rebuilding and selling to come up with the BEST single engine airplane ever built so I have stopped on selling. This is the one I will die with.
I hope I didn't bore you to much. If any interest in this I will post the building of a Two Winger :wink: :wink: :wink:

