Extractor Gouging the Brass

Help Support Ruger Forum:

BucolicBuffalo

Single-Sixer
Joined
Nov 23, 2014
Messages
261
Location
Land of Lincoln, not Chicago
I did a bunch of Chrony work this past week and shot the SR1911 for the first time since indoors this past winter. I had simply checked the primers and tossed all the brass in a bucket to deal with later. The Chrony tests were all done with new Starline brass and various loads. Almost all 230gr lead round nose of some form. But every case is gouged and most dinged. The little dings on the side are minor. It's the gouging. The extractor has a polished area on the front edge.

See if my pictures will post right. If not, I will work on it. The pics, not the gun.

IMG_1327.jpg


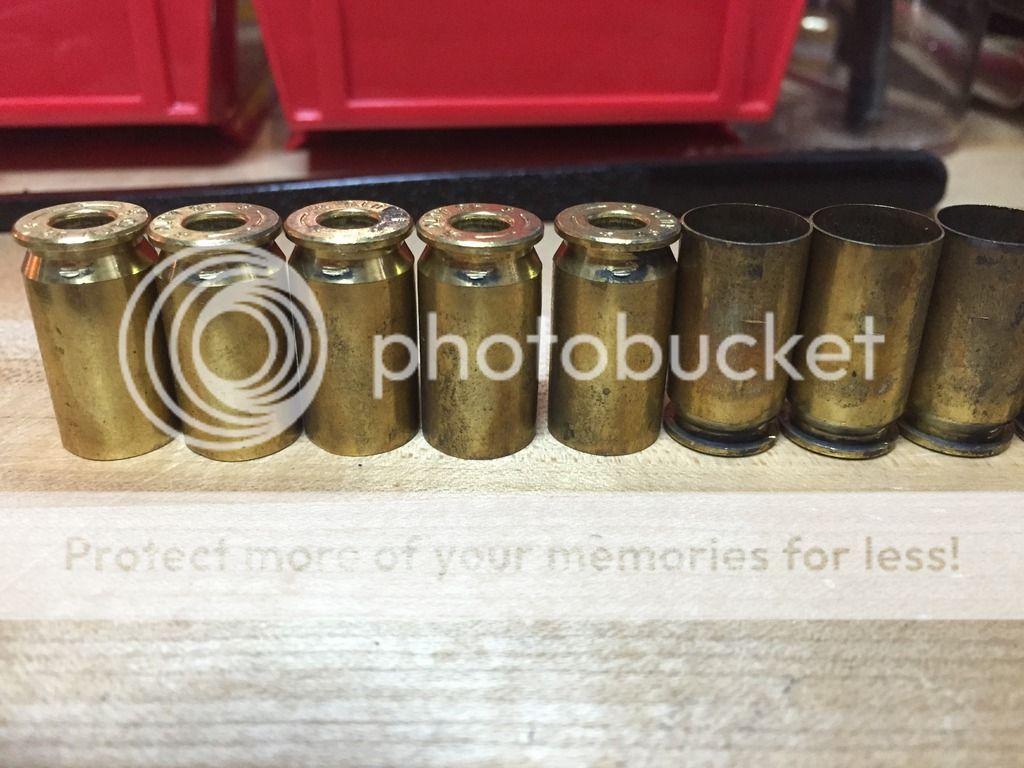
Nice gouges. None gouged though the case. The powder residue makes it look that way. I moved some light around to try to show it up the best.

IMG_1328.jpg


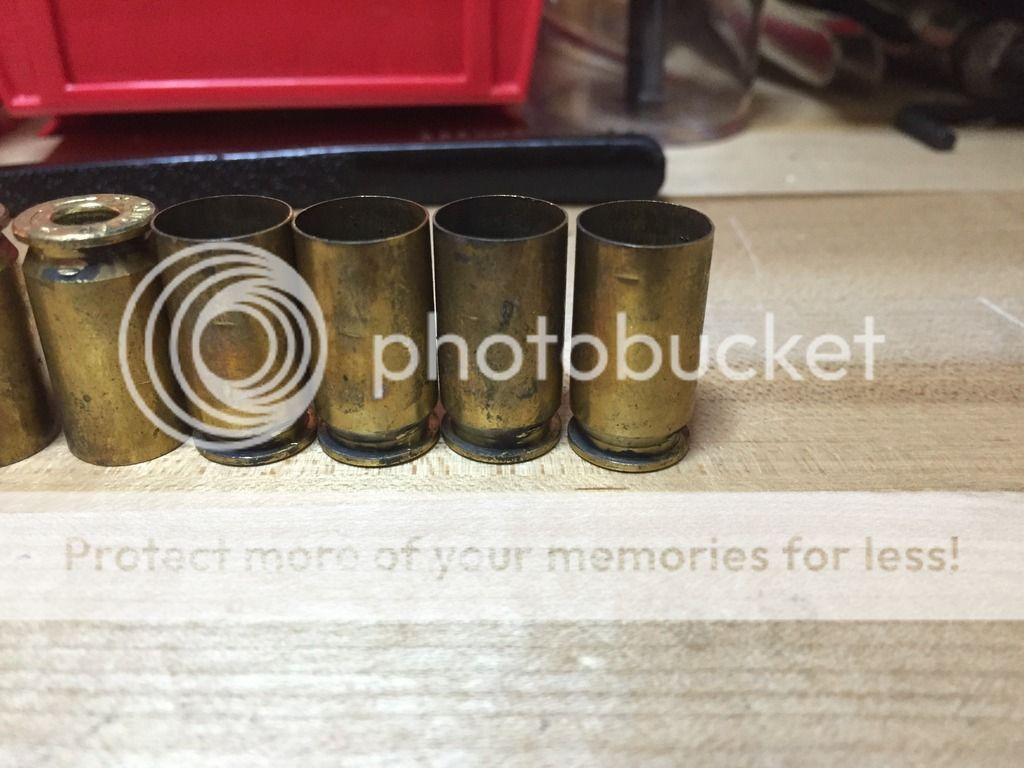
Just little dings. No big deal for those on the side. So I have read.

IMG_1321.jpg


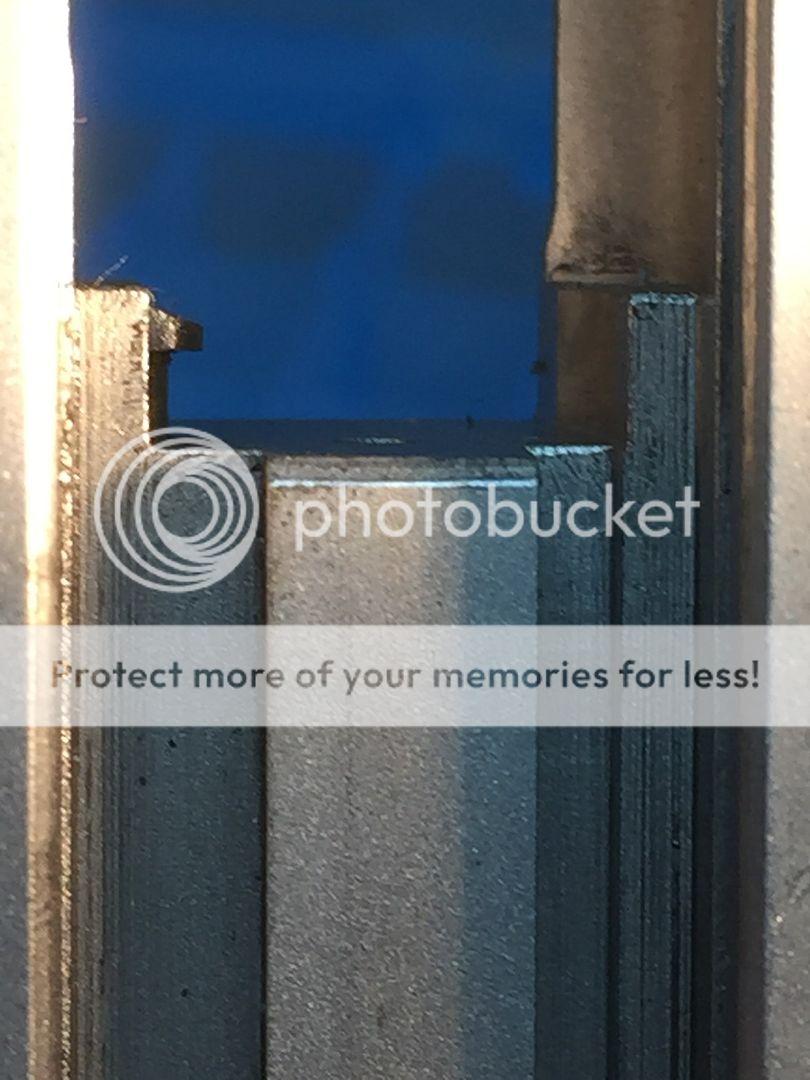
Does the extractor look like there is too much gap?

IMG_1323.jpg


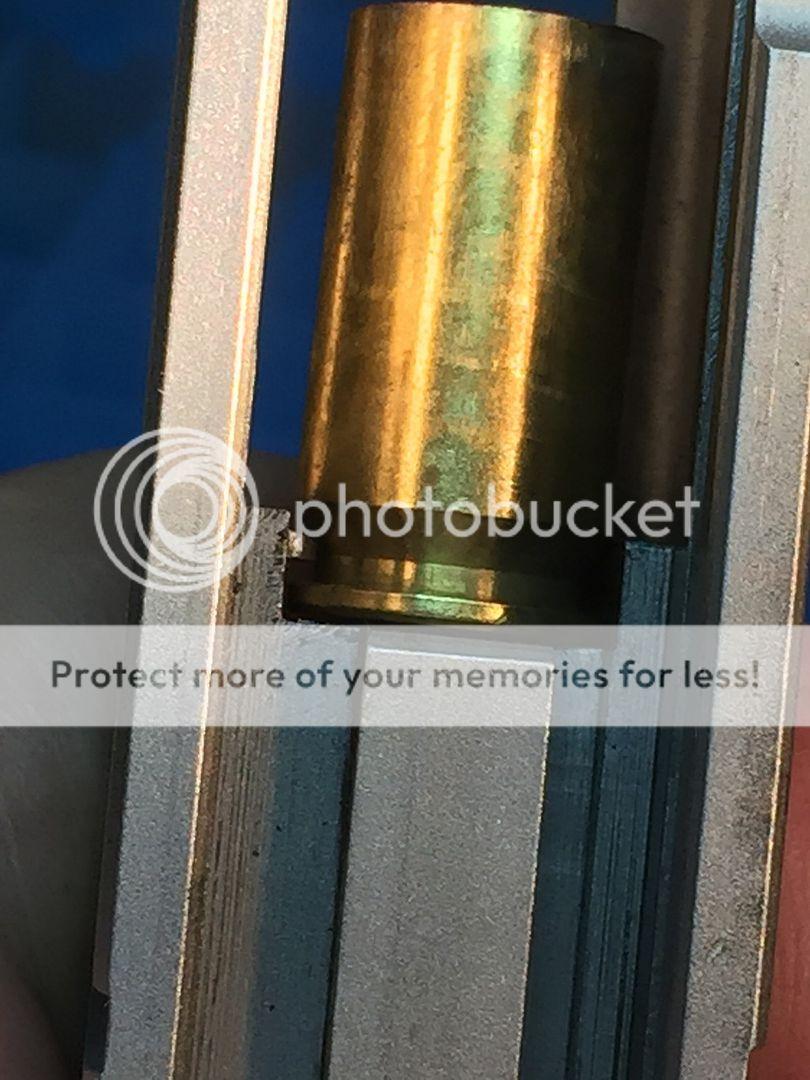
The extractor holds the cartridge but that upper portion doing the gouging appears to have a little gap. Is it just too tight? If so, how do I solve that? I am not a gunsmith. Don't pretend to be. But if it is something I can learn to do, I will look at learning. Thanks!
 

Precision32

Blackhawk
Joined
Jan 11, 2011
Messages
629
Location
Ocala, FL
You need to stone the top/right (as shown in your photo) slope of the extractor to match the slope of the cartridge case.

The extractor has to have as much space as it does between the breech face and the hook, as the round feeds at such an angle that with less space the rim will catch in it and prevent feeding.
 

BucolicBuffalo

Single-Sixer
Joined
Nov 23, 2014
Messages
261
Location
Land of Lincoln, not Chicago
Thanks for the info. I just viewed some videos on removing the extractor and firing pin w/spring on the SR1911. I had no idea it was so easy. A bit of careful work should solve it. The bonus is knowing how to quickly clean an area I cannot see.
 

Pat-inCO

Hawkeye
Joined
Oct 17, 2009
Messages
5,922
Location
In the AZ oven (Phoenix basin)
You received the correct information.
Let us know how things go. :D


P.S. . . . . EASE into it, a little at a time.
(Up side is that if you take too much the
cost of a new extractor is quite low, just
over $20 at Brownells). 8)
 

DGW1949

Hunter
Joined
Apr 10, 2005
Messages
3,921
Location
Texas
Be carefull that you don't launch that spring-loaded firing pin into orbit....or into your eye.

DGW
 

Precision32

Blackhawk
Joined
Jan 11, 2011
Messages
629
Location
Ocala, FL
I'm sure this is not a new idea, I've read it on many forums.

Get a plastic bag, the one your dry cleaning comes back in are great. Anything that is spring loaded gets taken apart inside the plastic bag. That way, when the spring loaded parts go flying, and they will, they're inside the bag. Saves a lot of time not having to find parts that went flying across the room.
 

BucolicBuffalo

Single-Sixer
Joined
Nov 23, 2014
Messages
261
Location
Land of Lincoln, not Chicago
That is a good idea. But not needed. This is actually quite easy to disassemble. I had always read that it wasn't necessary, but I can see crud on my cotton swabs. Cleaning from time to time can not be a bad thing.

I was careful and stoned just the one face that was the problem. Got it nice and polished. Took it out and shot it. Now it barely leaves a mark on that web area. The dings look much bigger, and they are small. There is just a bit of a rough area where the rim gets held by the extractor. But that is nitpicking. I think once it has a 1000 or so rounds though it maybe the nits will be even less.

Thanks again!
 

Precision32

Blackhawk
Joined
Jan 11, 2011
Messages
629
Location
Ocala, FL
Makes you feel good doesn't it? Yes, the 1911 is an easy firearm to dissemble and reassemble. In fact, the gun becomes the tools required to do a complete teardown and assembly.
 
Top