Ruger No.1 Restoration Project.....A Labor of Love! w/Pics

Help Support Ruger Forum:

Fulldraw™

Bearcat
Joined
Jun 16, 2009
Messages
17
Location
Mid-TN
I'm a big Ruger fan and especially a No.1 fan and I'm really glad to have found this site!!! For my first post I thought I'd share a little project with you. I hope you like it as much as I did.

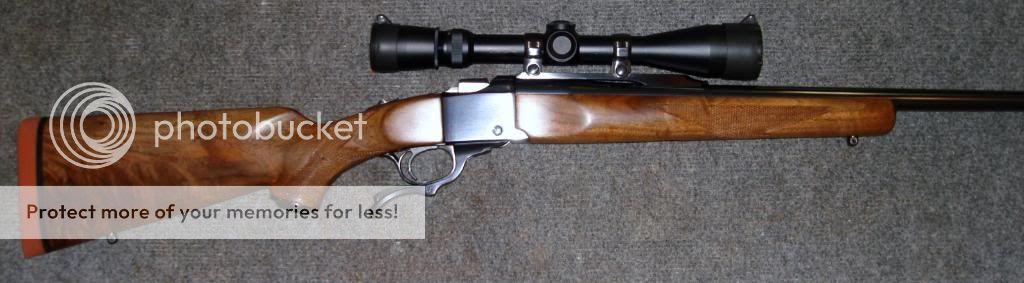
Whenever I frequent my area gun shops I like to look over their racks to see what they've bought or traded for. In February of 2008, low and behold I found a Ruger No.1, model 1-B in 30-06, on the used and abused rack. After fondling the rifle and examining the years of use and some abuse (mostly to the wood finish) I adopted this Ruger as my new pet for the mere sum of $325.00.

This rifle has a serial number prefix of #130, and from looking the number up on Ruger's website I found that the rifle was built late 1975 or sometime during early 1976. It is a pre-warning barrel but not a Liberty stamped barreled model. This serial number sequence does have the original and fully adjustable 3 screw trigger, that I adjusted to a very clean and crisp three pounds.

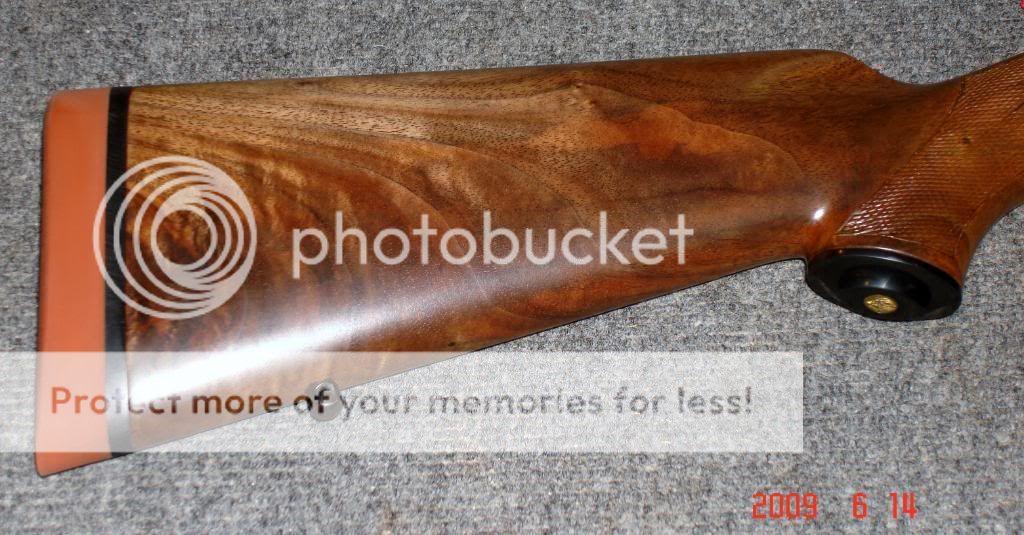
Originally I bought this rifle as a loaner or a donor rifle to re-barrel, thinking that this rifle as is might not shoot well due to old age and neglect. The finish on the wood looked scratched up and plain rough in a lot of places ..woof! The bluing was in fair shape except for what looked liked bloody fingerprints had removed. There sure was a lot of bore cleaning to do also!

While this Ruger hung out in my safe for a few months I contemplated what direction to take this rifle. The finish on this rifle had with age developed a sort of orange tint, and appeared to be "on the wood" instead of "in the wood." In the early 70's Ruger started using a spray polyurethane and that's why the finish had a glossy "on top" of the wood appearance.

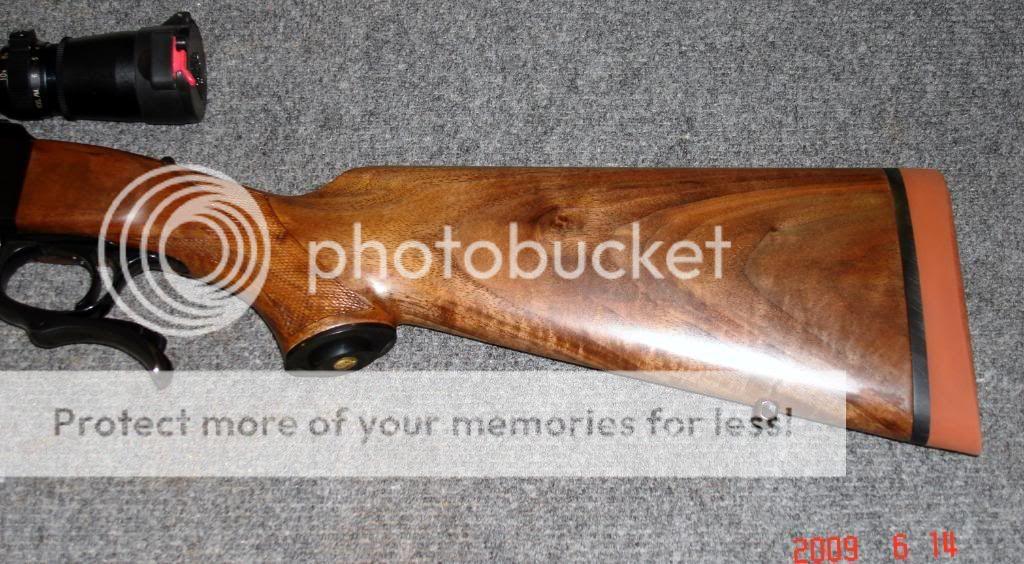
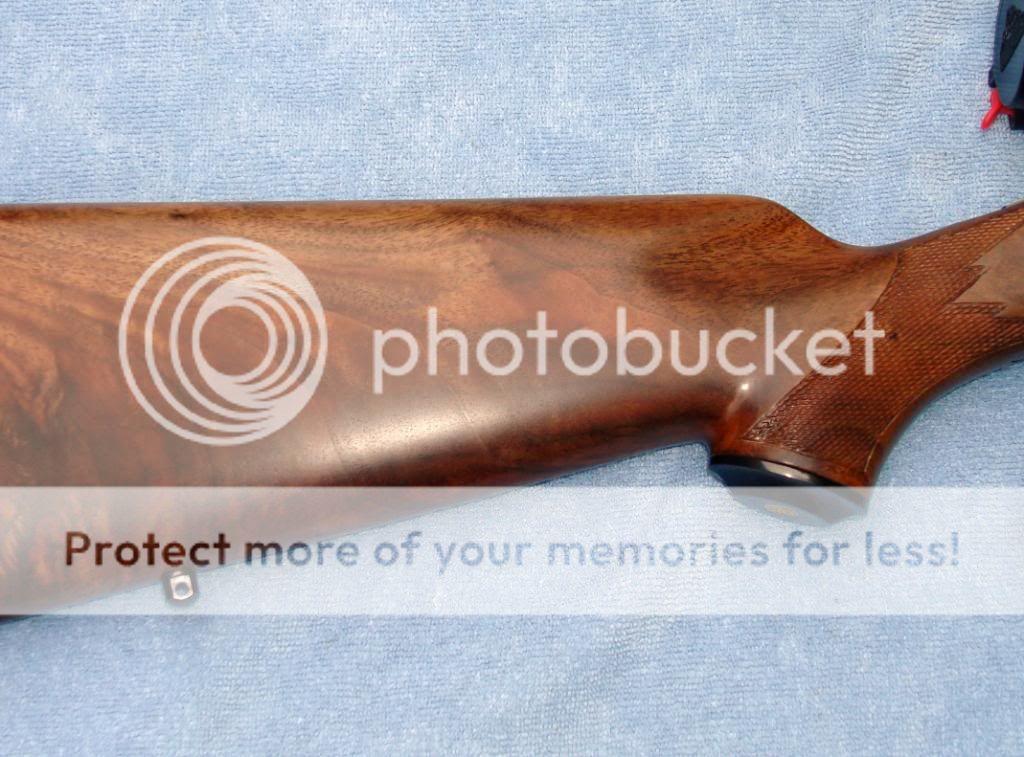
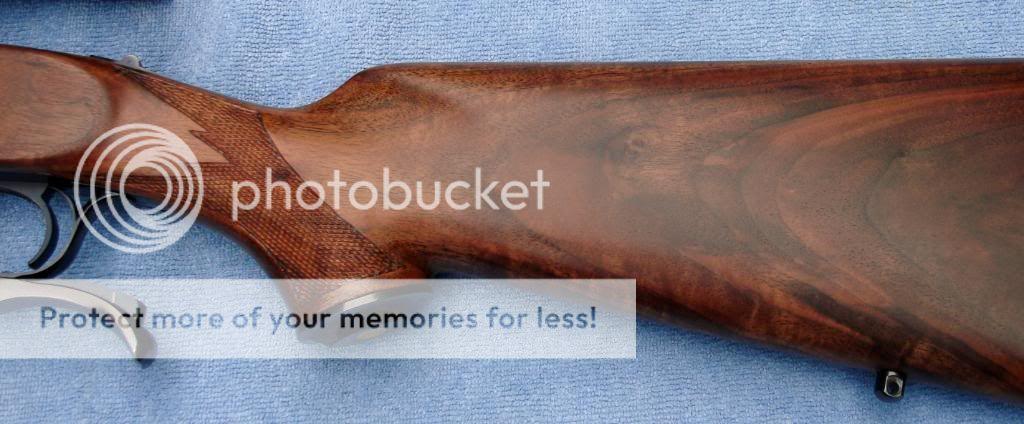
I stripped off the old finish, sanded the stock, and gave the bare-naked wood a hand rubbed lovingly applied oil finish. I love the look and warmth of an oil finished rifle stock best AND they are so easy to repair should it be necessary.

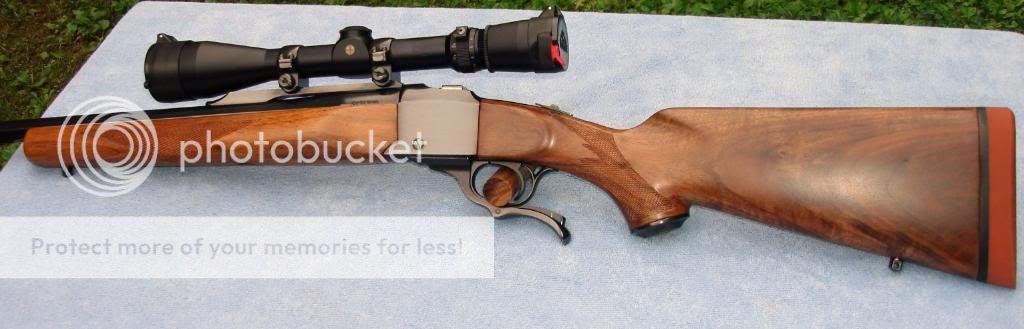
I put a Loopy VX-III 3.5 X 10 X 40 on the rifle that I had lying around Soon it was off to the range to test fire this newly restored Ruger No.1. Was I ever in for a pleasant surprise!!! I had some "cheap" factory ammo to test fire the gun with and some more pricey fodder to stuff in the barrel. When I looked through the spotting scope to check the first group I refused to believe my eyes!!! After four more groups were shot I had an aggregate group size that hovered at about ONE INCH! That's a no brainer... this rifle will be left as is, no re-barrel for this baby yet. Aw shucks, I'll just have to find another donor rifle for that re-barrel project.

I was pleased with the outcome of my project! You can judge for yourself from the pictures provided.

DSC00343.jpg


DSC00345.jpg


DSC00344.jpg


DSC00346.jpg


DSC00349.jpg


DSC00350.jpg


DSC00367.jpg


DSC00368.jpg


DSC00366.jpg


DSC00364.jpg


DSC00360.jpg
 

picketpin

Buckeye
Joined
Jun 29, 2006
Messages
1,544
Location
Owyhee County, ID, USA
Fulldraw: Looks great, you did well.

The Ruger Corporate Site's serial nubers are general in nature and or only accurate withing a wide range.

Guns were not assembled in any particular serial sequence so the manufacture and ships date can vary widely from the generic dates that are listed. I have one non prefix #1 that didn't ship till 1975!!

I'd would gues that your riflew was built at the tail end of 1975. THe 2nd style checkering on your butt stock was pretty much phased out by mid 1976 and as you mention, yours is not 1976 - 200 Year marked.

You can send a letter to Ruger records and they can tell you the ship date.

If you look inside the barrel channel of the forearm, there ma or may not be a date stamp. If there it is the date that the first coat of finish was applied and is generally thought of as the "build" date. Ruger apparently does not retian this date or if they do, won't give it to you.

The best

Ross
 

Ruger1nut

Blackhawk
Joined
Sep 3, 2006
Messages
766
Location
Honeoye NY
Very nice. I agree with Ross and it probably was assembled late in 75 but shipped in 76 early and missed the stamping

I like that checkering pattern better anyway

Dave
 
A

Anonymous

Very nice!! Want to make a quick saw buck on that old wreck ;^)
 

gcf

Bearcat
Joined
Aug 6, 2006
Messages
48
Location
Corpus Christi, TX
Very nice job on the restoration!

Would you care to provide additional details on how you stripped the old finish, & what oil you used to re-finish?

Also, who's recoil pad did you use? Thanks in advance!
 

Fulldraw™

Bearcat
Joined
Jun 16, 2009
Messages
17
Location
Mid-TN
gcf":sv6giral said:
Very nice job on the restoration!

Would you care to provide additional details on how you stripped the old finish, & what oil you used to re-finish?

Also, who's recoil pad did you use? Thanks in advance!

Hey guys thanks for the kind words!

An oil finish is easy to do, maintain, and repair if necessary. The Purdey's Warthog and the Napier of London gun stock refinishing kits are good products. IMHO, Birchwood Casey's Tru-Oil is also quite an excellent product that is cheap and available everywhere...but is persnickety to use for the first time user. PATIENCE is the key with a Tru-Oil finish. This rifle was a BC Tru-Oil Project.

The Citrus gel style strippers work very well. Once the stock finish is stripped make sure to re-install the recoil pad and use a sanding block to maintain nice smooth 90 degree edges between pad and stock. On this project I had to replace the original Ruger red recoil pad, with a Pachmayr.

On the Ruger No.1 you have to drill out the pistol grip medallion to get to the screw holding it in place. Call Ruger and order a few...they are cheap. Remove pistol grip cap to strip finish and re-install and protect with painter's blue tape before sanding to maintain edge profile, then remove to refinish and etc.

After finish stripping make sure to carefully tape off the checkering with painter's blue tape to protect it before sanding. The checkering should only have 1 or 2 very thin coats of Tru-Oil applied with a toothbrush AFTER you have applied all the coats of finish to the entire stock.

The stock should be sanded to baby butt smooth to 400 or 600 grit sandpaper. You should either use a stock filler like French Red or wet sand the Tru-Oil (very nice). Make sure to steam out any dents or scratches then sand the high spots smooth. Lightly sand with 400 girt or buff with 0000 steel wool between coats. I use a lot of steel wool to buff and it helps to have compressed air and a tack cloth to chase the steel fibers.

If you go with the BC Tru-Oil let me help you shorten your learning curve...thin the Tru-Oil with mineral spirits to ratio of 1 part BC Tru-Oil to 4 or 5 parts mineral spirits. The secret is several thin coats. Order some of the finish felt pads from Brownell's along with their stock rubbing compounds and only begin the final rub-out after the finish has had at least a week to firmly set-up and dry.

The pics of this No.1 don't really show how the finish really came out. In natural sunlight it really is awesome even I say myself.
I will put this finished gun project up against the finish on any 10K Italian shotgun...it's that good. Yes, I'm not being very modest, but I was proud of how it turned out!!!

I've just completed a new stock refinish project on a Ruger 77/22 .22 Hornet that has a laminated stock that I have also posted pics of here on the forum.

If anyone needs more info I'll be more than happy to oblige!

An oil finish is truly a labor of love.....and worth it!
 

gcf

Bearcat
Joined
Aug 6, 2006
Messages
48
Location
Corpus Christi, TX
Fulldraw™":3mgb569j said:
The stock should be sanded to baby butt smooth to 400 or 600 grit sandpaper. You should either use a stock filler like French Red or wet sand the Tru-Oil (very nice)...

If you go with the BC Tru-Oil let me help you shorten your learning curve...thin the Tru-Oil with mineral spirits to ratio of 1 part BC Tru-Oil to 4 or 5 parts mineral spirits. The secret is several thin coats. Order some of the finish felt pads from Brownell's along with their stock rubbing compounds and only begin the final rub-out after the finish has had at least a week to firmly set-up and dry.

An oil finish is truly a labor of love.....and worth it!

Thanks for providing the great tips. There are obviously no shortcuts, to a full stock restoration.

Good to know about the citrus stripper products, as they are commonly available - & seem to be easy on the wood. I've seen a number of different finish removal methods endorsed in the past, but I always worry about damaging a nice (& expensive) piece of wood.

I am curious about your recommendation for stock filler, or wet sanding. I have noticed that normal wood grain often takes a lot of oil to fill smoothly. Is this what you refer to here?

I've never used a stock filler, & am not familiar w/ French Red. Difficult to use?

A have used a method referred to as "slurry sanding" in the past. Believe it or not, it essentially boils down to (after stripping the stock of course) dipping the sandpaper in your oil of choice, & then sanding in a circular motion. Then wood must be wiped w/ a lint free cloth between sessions.

Kind of goes contrary to traditional methods, & is REALLY messy, but seems to do a good job of filling both larger scars & fine grain.

Is the wet sanding you refer to a variation on this theme, or more of a traditional (water & sandpaper) method?

Finally, I've got to admit that I've never considered reducing wood finish oil. I can see how it would be advantageous though - especially on a well (lovingly) prepared surface. Amazing how the simple things just get right past a guy, some times... ;=]

BTW, the Pachmayr (SP?) looks great, & will surely be a "comfort" during those load development sessions, that will be coming up.

Again, an exceptionally nice job!
 

roofinspector

Single-Sixer
Joined
Jan 20, 2009
Messages
282
I too would like to replace my factory red pads with a pad of more length. Is the Pachmayr red pad that you used, a currently produced model? I tried to look at the Pachmayr site, but did not see a red model pad.

Nice looking No.1 by the way.
 

Fulldraw™

Bearcat
Joined
Jun 16, 2009
Messages
17
Location
Mid-TN
gcf":3tgjs0un said:
I am curious about your recommendation for stock filler, or wet sanding. I have noticed that normal wood grain often takes a lot of oil to fill smoothly. Is this what you refer to here?


I've never used a stock filler, & am not familiar w/ French Red. Difficult to use?

A have used a method referred to as "slurry sanding" in the past. Believe it or not, it essentially boils down to (after stripping the stock of course) dipping the sandpaper in your oil of choice, & then sanding in a circular motion. Then wood must be wiped w/ a lint free cloth between sessions.

Kind of goes contrary to traditional methods, & is REALLY messy, but seems to do a good job of filling both larger scars & fine grain.

Is the wet sanding you refer to a variation on this theme, or more of a traditional (water & sandpaper) method?

Finally, I've got to admit that I've never considered reducing wood finish oil. I can see how it would be advantageous though - especially on a well (lovingly) prepared surface. Amazing how the simple things just get right past a guy, some times... ;=]

BTW, the Pachmayr (SP?) looks great, & will surely be a "comfort" during those load development sessions, that will be coming up.

Again, an exceptionally nice job!

What I was calling wet sanding is the same as the wet slurry sanding you refer to.

French Red is available in clear and colors as sealers and stains. The original products if memory serves was by a company called Herter's. It has been used by a lot of custom stock makers to duplicate the reddish glowing tint in walnut that the pre-64 model 70 was famous for. It's good stuff and easy to use. The clear filler would have been a good choice for this particular project.

With the wet sanding slurry method, I start only after giving the stock a soaking coat of the Tru-Oil and letting it dry. Then I start with the wet (Tru-Oil unthinned) slurry sanding across the grain over the whole stock. As I finish each wet sanding coat I wipe across the grain with a paper towel or lint free cotton rag. I usually do this process 3 times. This is the same process I used on the Hornet restoration that I posted here: http://www.rugerforum.com/phpBB/viewtopic.php?t=60043

Let me share an in invaluable tip about filling the pores of wood stock: Make sure you check it in the natural sunlight! I don't care how good your eyes are or your shop lights are...when you think you've got it right walk outside and you'll find some more spots that need attention! Nothing like sunlight to shine on the imperfections!

I learned the hard way that by thinning the Tru_Oil it was easier to apply, left fewer drips to sand out the next day, and makes it easier to smooth out the finger prints left from rubbing the finish.

I hope this helps with your next project!

P.S.

Here's a link to a pdf file that might interest you: http://www.birchwoodcasey.com/sport/howto/bcref2003.pdf
 

Fulldraw™

Bearcat
Joined
Jun 16, 2009
Messages
17
Location
Mid-TN
roofinspector":odtc124e said:
I too would like to replace my factory red pads with a pad of more length. Is the Pachmayr red pad that you used, a currently produced model? I tried to look at the Pachmayr site, but did not see a red model pad.

Nice looking No.1 by the way.

Roofie,

The pad you see pictured is indeed a Pachmayr pad that ordered from Brownell's last year. I took a spin through their website and didn't find it. I'd call Pachmayr to find one...surely there is one out there to be had!

Good luck!

Jerry
 

gcf

Bearcat
Joined
Aug 6, 2006
Messages
48
Location
Corpus Christi, TX
Fulldraw™":37plxb4q said:
What I was calling wet sanding is the same as the wet slurry sanding you refer to.

With the wet sanding slurry method, I start only after giving the stock a soaking coat of the Tru-Oil and letting it dry. Then I start with the wet (Tru-Oil unthinned) slurry sanding across the grain over the whole stock. As I finish each wet sanding coat I wipe across the grain with a paper towel or lint free cotton rag. I usually do this process 3 times. This is the same process I used on the Hornet restoration that I posted here: http://www.rugerforum.com/phpBB/viewtopic.php?t=60043

I learned the hard way that by thinning the Tru_Oil it was easier to apply, left fewer drips to sand out the next day, and makes it easier to smooth out the finger prints left from rubbing the finish.

I hope this helps with your next project!

P.S.

Here's a link to a pdf file that might interest you: http://www.birchwoodcasey.com/sport/howto/bcref2003.pdf

Thanks for the clarification, & additional details.

Here is a link to Gun Plumber's web site:
http://www.arizonaresponsesystems.com/

He describes the slurry sanding process in Notes / Surplus Stock Restoration. Nice to know the process works for fine sporter stocks, as well as "serious social occasion" rifles.

I'm sure you will get a kick out of his method of stripping the old finish. Interesting, but I'm not sure that I've got the cojones to try it on my next No.1 wood project.
 

gcf

Bearcat
Joined
Aug 6, 2006
Messages
48
Location
Corpus Christi, TX
roofinspector":2y9b4g5p said:
I too would like to replace my factory red pads with a pad of more length. Is the Pachmayr red pad that you used, a currently produced model? I tried to look at the Pachmayr site, but did not see a red model pad.

Nice looking No.1 by the way.

I like 'em too - nice retro touch...

Got to wonder if Ruger is not using the same pad on their M77 Hawkeye series??

http://www.ruger-firearms.com/Firearms/ ... 4&return=Y
 
Top