New Project: Custom 10/22 Target Rifle

Help Support Ruger Forum:

TINCANBANDIT

Single-Sixer
Joined
Jan 3, 2014
Messages
216
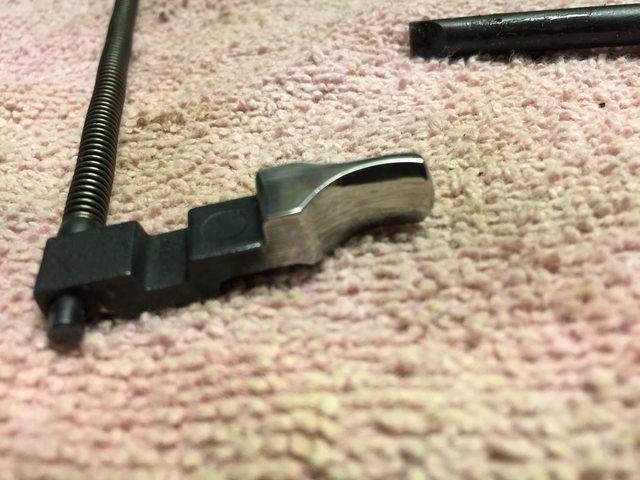
The charging handle was not the best looking one I have seen. I could have easily bought one for $30-$50, but some of those aftermarket ones add weight to the reciprocating assembly which can cause extraction issues.


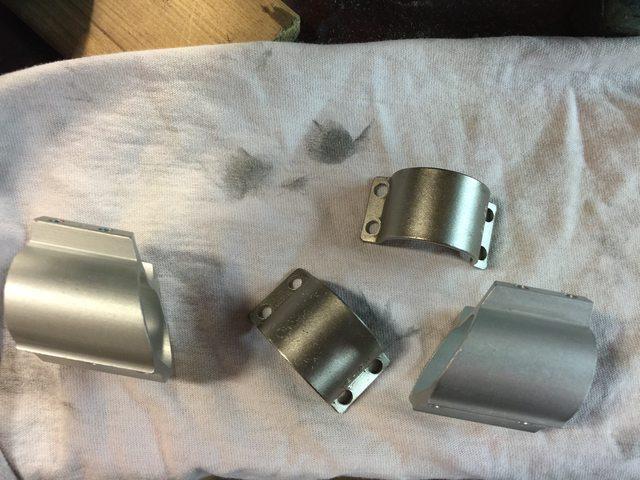
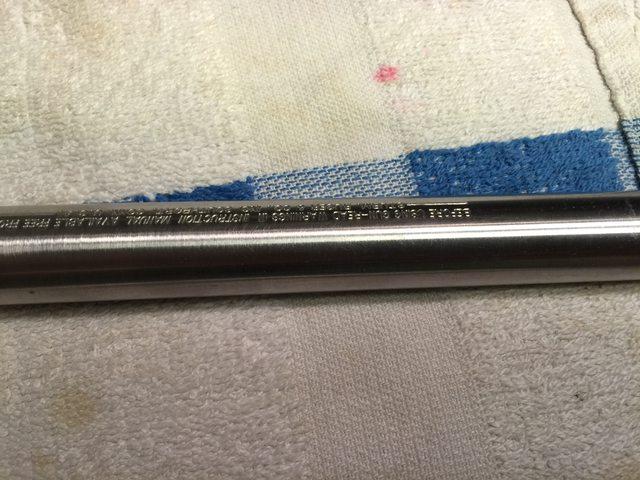
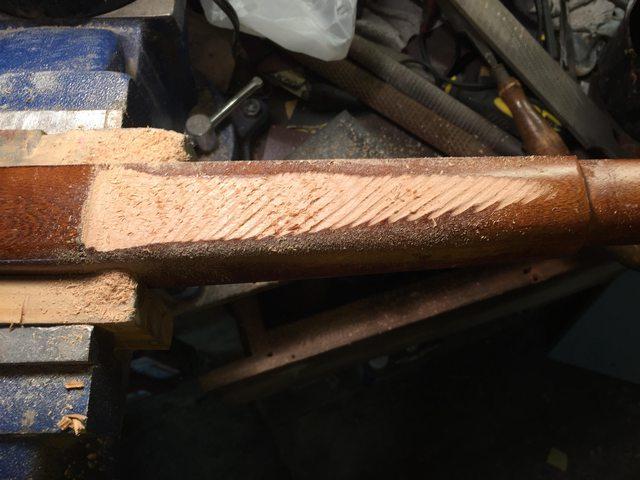
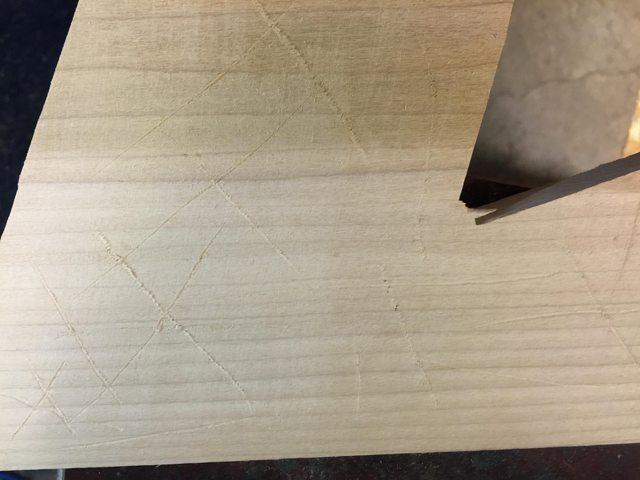
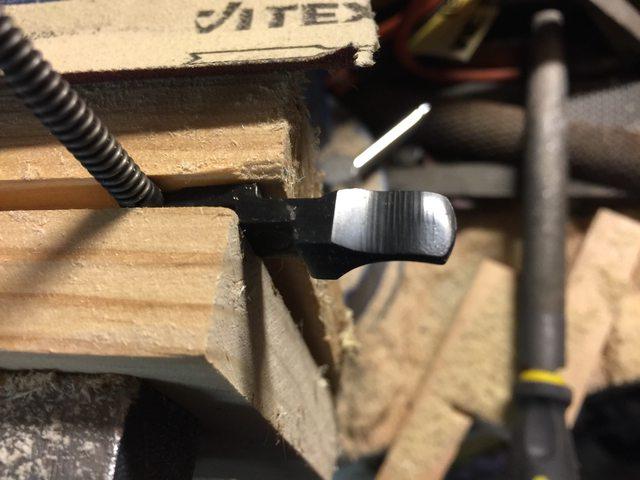
Here is what it looked like when I started, you can see the machine marks in the back of the handle

kApln1Ul.jpg


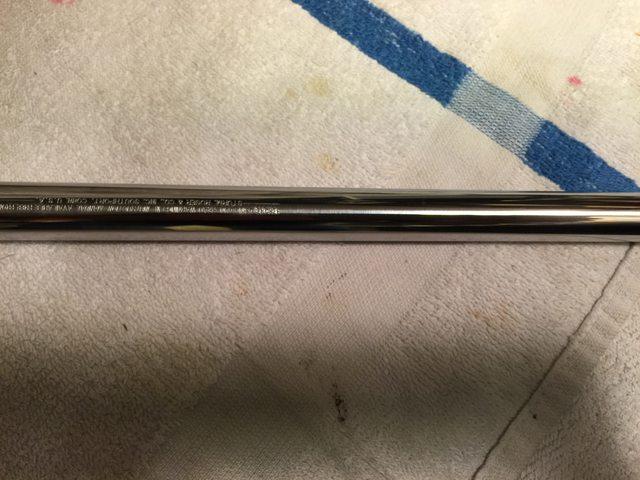
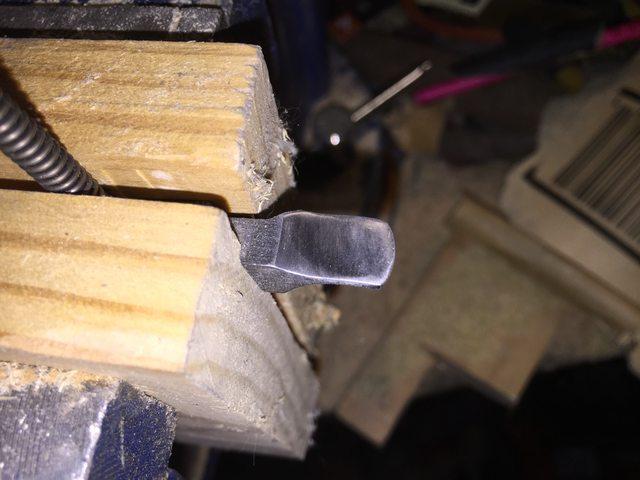
After removing the machine marks I polished it to a 600 grit

Gl15QFbl.jpg


Then I did the same to the front

K1vb1scl.jpg


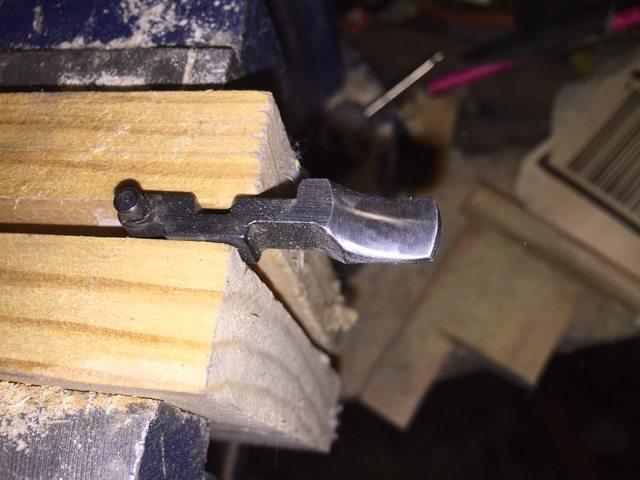
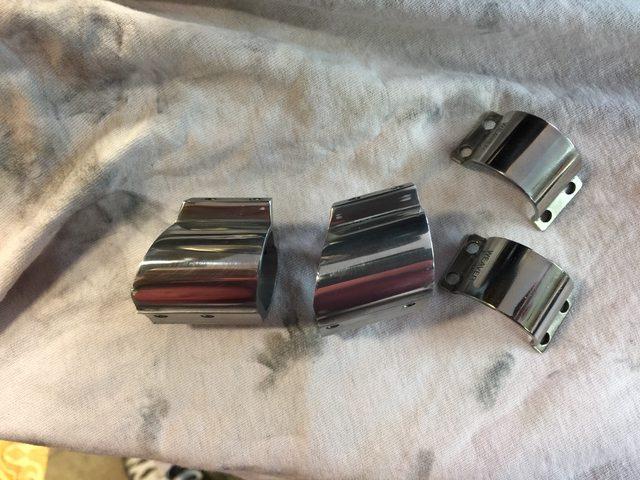
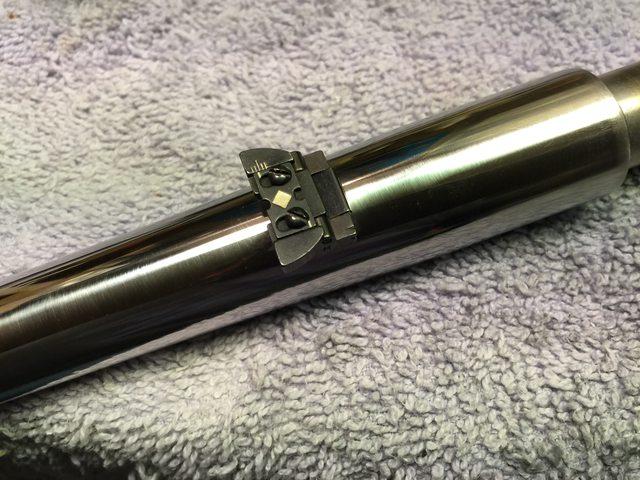
After polishing on the buffer

RluT0EDl.jpg


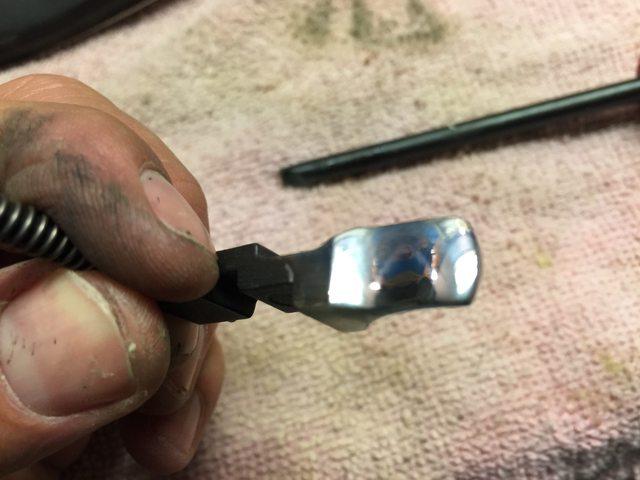
The handle is made of steel, so I will need to keep and eye on it and polish it from time to time.

grmq84Nl.jpg
 

TINCANBANDIT

Single-Sixer
Joined
Jan 3, 2014
Messages
216
I bought this generic rimfire scope (nearly identical to my Tasco scope I installed on my Savage Model 93 Varmint Sniper Project).

It has a lighted recticle that lights up in red or green, a 50mm objective and 6-24 power adjustable magnification.

lLPd6fgl.jpg


While I was at it I bought this sun shade for a few bucks

O6zrXGJl.jpg


I didn't want a black scope on my white and silver rifle, but the silver version of this scope was nearly double the price, so I decided to buy the black one and paint it silver myself.


For the paint I chose Rustoleum Silver Metallic. Based on some online reviews, it seemed like a decent paint and it was affordable at just $3.95 a can.

ovEq9txl.jpg
 

TINCANBANDIT

Single-Sixer
Joined
Jan 3, 2014
Messages
216
I removed the sun shade and end trim along with the turret covers. I then taped up the lenses and the other parts I didn't want painted. This scope (as many of the newer ones are) is coated in some sort of teflon like, non-stick coating.....the tape didn't want to stick to it.

vuyaCgKl.jpg


sEYfEczl.jpg


After a few light coats I removed the tape and re-assembled the scope

CJcdTNNl.jpg
 

TINCANBANDIT

Single-Sixer
Joined
Jan 3, 2014
Messages
216
I then turned my attention to the aluminum and stainless scope mounts, here they are before:

fndr4REl.jpg


and after polishing

laUDSSNl.jpg


Also just a side note.....when I opened the scope mount packaging I noticed there were only four of the eight screws needed to hold down the upper clamps. I sent an email off to Weaver. They sent four more screws right away without question.

VEdV5m5l.jpg
 

TINCANBANDIT

Single-Sixer
Joined
Jan 3, 2014
Messages
216
Link to the blog post for those interested

http://tincanbandit.blogspot.com/2016/09/the-1022-target-rifle-project-part-5.html
 

TINCANBANDIT

Single-Sixer
Joined
Jan 3, 2014
Messages
216
I am sure many who are reading this are wondering why I didn't pony up the dough for an aftermarket bull barrel. I did actually shop around and found that Green Mountain Barrels has the best bargain (great quality with decent prices). A Green Mountain bull barrel would have set us back $150-$200 (depending on options), which could be 1/2 our entire budget.
2VXnn0ul.jpg


So instead I chose a factory one. Besides changing barrels on the 10/22 is easy and we can always upgrade later. In addition many shooters have been able to get great accuracy/precision from the factory barrels.
The barrel is a standard 18.5" factory Ruger stainless barrel, 1 in 16 right hand twist rifling.

It did not have a rear sight when I got it, but thankfully I have an extra one that came off my 10/22 Spencer Carbine project

The barrel will get a full polish, the rear sight installed and then installed on the receiver.

Here is the barrel before, it has a "brushed" finish, which looks OK, but I want Ava to shine.

ke9eKVyl.jpg


We started with 400 grit sand paper sanding in both lengthwise and shoe shine fashion. I then went through 600, 800, 1000, 1500, 2000 grit papers before finishing with Crocus Cloth.

Z0jGApal.jpg


And after polishing

Ismn4yql.jpg


I then installed the rear sight and set it aside while I finish up the the other parts. I'll give it another once over before final installation

Qvu9oaUl.jpg
 

TINCANBANDIT

Single-Sixer
Joined
Jan 3, 2014
Messages
216
The stock is by far the most ambitious part of this build, so I saved this for last.
I intend to modify a factory beech wood stock using pieces of poplar to create a custom target thumb-hole stock, fitted perfectly to myself.
Included will be a few modifications like a rear tang and a bedding solution using JB weld and some parts I had laying around the shop.


The first step was to figure out how big of pieces I needed to cut to make the stock. I traced a factory stock onto a big sheet of scrap paper

z6NyLGFl.jpg


To figure out the size/location of the pistol grip/thumb-hole I used my the stock from my Hoplophobe Project that was almost completed

hLlPImgl.jpg


The new piece measures approx. 4.5 x 14", I will cut it a bit on the long side, I can always cut the butt stock to get the proper length of pull.

sbm2BNVl.jpg
 

TINCANBANDIT

Single-Sixer
Joined
Jan 3, 2014
Messages
216
I think I want to build up the area behind the receiver. When I add the rear tang I might end up a little thin on material there.


Before cutting the new butt stock pieces we went to work cutting the original stock

GrTDtytl.jpg


P1NjLiIl.jpg


I couldn't figure an easy way to cut the forend, so I decided to do it by hand. I drew a line just up from the take down screw hole

wck2jOFl.jpg


mCHIO8Ml.jpg
 

TINCANBANDIT

Single-Sixer
Joined
Jan 3, 2014
Messages
216
I removed the barrel band section

211riUsl.jpg


I then cut the pieces for the forend

LITZZRRl.jpg


and started gluing them on

wRZzoXbl.jpg


Now the sides and bottom are glued on, I need to build a piece to plug the end and we can start making saw dust

HaZtbEWl.jpg
 

TINCANBANDIT

Single-Sixer
Joined
Jan 3, 2014
Messages
216
I made the end piece from two pieces of 1x4 poplar

MPKIdFJl.jpg


opening up the barrel channel, I'll work on this more later as I want a completely free-floated barrel

pcODb29l.jpg


9NxbmPzl.jpg


The popsicle sticks are to build up the area to make it thicker, I will follow the line tapering it to disappear at the front of the forearm. This will act as a finger hold as well as an accent.

TJa6SQgl.jpg
 

TINCANBANDIT

Single-Sixer
Joined
Jan 3, 2014
Messages
216
I started with the rasping and filing.....I'll thin the new pieces and taper them toward the front.

RgMc9HIl.jpg


blog post link:

http://tincanbandit.blogspot.com/2016/10/the-1022-target-rifle-project-part-7.html
 

TINCANBANDIT

Single-Sixer
Joined
Jan 3, 2014
Messages
216
Before cutting and attaching the butt stock I wanted to fit the rear tang and bed the receiver. I found this flanged washer in my nut and bolt bin, I have no idea where it came from, but it is perfect for this application. I'll install in in the front action screw hole so when the screw in tightened the wood cannot flex and cause the barrel to change point of aim.

0Pdnq7Ql.jpg


I could have bought one of these units made for the 10/22, but again, I have to stick to a budget and use as many DIY solutions as I can

Hfdhc5vl.jpg


I drilled out the hole to 3/8" and checked the fit.

Q1DzlCml.jpg


In order to make sure the new pillar will touch the screw escutcheon and also not raise the height of the receiver, I'll need to take some material away. I used a spade bit to remove the wood. JB weld will go underneath the pillar to fill any gaps and secure it to the wood.

C7MzgEfl.jpg
 

TINCANBANDIT

Single-Sixer
Joined
Jan 3, 2014
Messages
216
Next I marked and removed the wood to make room for the rear tang and anchor

MAKDto2l.jpg


6RhlCrKl.jpg


Before mixing up the bedding compound (JB Weld) I cut a groove in the anchor to help the JB Weld "bite" into the metal


NOcgv0El.jpg


I then taped up the receiver and barrel, then coated the threads with wax. Mixed up the JB weld and put the receiver in the stock using a clamp to hold it down.

TWhBw5Kl.jpg
 

TINCANBANDIT

Single-Sixer
Joined
Jan 3, 2014
Messages
216
When I cracked it open in the morning, the anchor was nicely secure in the stock, I should have put some release agent on the tape though, now I have some cleaning to do.

GC1wlMNl.jpg


Up front we have a nice platform for the action to sit on, the pillar is just below the surface. The barrel bed was not thick enough, I'll wait until it is cured and put another layer in

9uuBCbgl.jpg


While I was waiting for the bedding compound to cure I began sanding on the forend. I want the three sides to taper towards the front. I also wanted to leave a rib that would disappear at the muzzle.

tcZTrDol.jpg


Here it is after mucho sanding, still some work to do, but I'm getting close

3VSkkqkl.jpg


nIdoAZvl.jpg
 

TINCANBANDIT

Single-Sixer
Joined
Jan 3, 2014
Messages
216
I then added more JB weld to the barrel area and around the rear tang. The JB weld despite being sticky is quite runny, but no worries I am filling in that area later.
This time I added release agent (wax) to the taped areas so it would not stick.

z6FYB5ll.jpg


It doesn't look pretty on the inside, but no one will see that and it does what it supposed to do, support the action front and rear.

I probably should have used Devcon, instead of JB Weld, but I already had JB Weld, so another lesson learned.
The yellow residue is wax, the blue is the tape...I'll clean up the over flow before we're done.

nY1ifpYl.jpg


The barrel will be supported for the first couple of inches, the rest of the barrel will be free-floating.

cI7PQXkl.jpg
 

TINCANBANDIT

Single-Sixer
Joined
Jan 3, 2014
Messages
216
Blog post link: http://tincanbandit.blogspot.com/2016/10/the-1022-target-rifle-project-part-8.html
 

TINCANBANDIT

Single-Sixer
Joined
Jan 3, 2014
Messages
216
In this installment I will cut out the butt stock and cheek rest, then begin with the contouring of the wood.

I used the template I made and transferred it to the slab of poplar wood and cut out the lower butt stock pieces

bgzKmaGl.jpg


My pistol grip will be angled backwards a little more than Hipshot's is. I like the angle of the Hoplophobe stock's grip that I made, so I copied it onto the paper.

eZ7B40ql.jpg


I cut them a little large, easier to remove wood then add it, at least that is what they tell me....

uV88rerl.jpg


I then roughed up the surfaces and glued them together

P0xBEvEl.jpg
 

TINCANBANDIT

Single-Sixer
Joined
Jan 3, 2014
Messages
216
Then I cleaned up the top and roughened the surfaces so I could mate it to the Ruger stock

0xsf8t9l.jpg


And now the two become one, it doesn't look like much now, but after some drilling, filing and sanding...

kZCQasll.jpg


I had to use the Dremel to make room for the trigger guard


thyLm8ol.jpg


Fitting the receiver/trigger assembly to the stock. I marked where my fingers and thumb land on the pistol grip so I can begin removing wood

siscgAHl.jpg
 

TINCANBANDIT

Single-Sixer
Joined
Jan 3, 2014
Messages
216
I drilled a few holes along the perimeter and cut between them with a jig saw

AXEEyIkl.jpg


Making progress

VNm15gPl.jpg


Almost there, it feels pretty good in the hand, I need to remove more from the top of the thumb-hole to get it round and make clearance for my thumb knuckle.

TNxz2bxl.jpg


Now I need to decide where to trim the pistol grip and determine the size of the cheek rest.

Looking at Hipshot's version, the radius at the bottom to the stock is about even with the back of the thumb-hole, so I need to finish off the thumb-hole, then map out the area to trim

4wQZViHl.jpg
 
Top