PALADIN85020
Bearcat
It took me a long while to learn and develop these techniques, and they may prove useful for you, too. Hope these tips help.
First, use a tripod. If you are using a digital SLR, and it has automatic image stabilization, turn it off. Your tripod will stabilize the camera, and the camera's attempt to stabilize the image sensor will just make it worse, introducing some unwanted fuzziness.
Lose the "haze filter" or any other protective glass in front of the lens. Use a lens shade. These things will help to ensure clarity and unwanted light reflection in the lens.
For utmost clarity, prime (fixed power) lenses usually work best because they have fewer internal elements. In spite of that, most medium-range or kit zoom lenses work pretty well and are more convenient. One problem I've found with the zooms is that when you work at the maximum wide angle setting (which is 18mm, or about 27mm in 35mm terms on mine), you may get some noticeable barrel distortion. I have an 18-55mm zoom range on my Pentax, and I find it best to use 35mm or better to alleviate this problem. Your lens may vary from this, but look for any distortion at the lower mm settings.
Use a cable release or set your camera to trigger with a 2-second delay. This absolutely minimizes camera shake from either your finger or the flip-up of the internal focusing mirror.
Forget automatic focusing. Look carefully through the viewfinder and focus manually; be sure the things you want to be sharp are indeed focused on.
Do NOT just look at the review image on the back of the camera to decide if the picture is exposed correctly. Your ambient light level will vary your perception of the image. Bring up the exposure histogram, and be sure all the peaks are within the two extreme limits, not cut off, and not way over to one side, unless a lot of your picture is either pure white or black.
Expose manually, controlling both the aperture and the length of exposure. Use a tight aperture; I use F/8 or better. F/8 is usually about right, giving you enough depth of field to be sure the entire gun is well in focus. Going down to F/12 or F/16 or even F/32 gains you nothing, and you may get chromatic aberration around the edges of what you are shooting. A high contrast background is no problem with manual exposure. Once you have the aperture setting, vary your length of exposure up or down until your histogram shows you have it right. With a digital camera, this costs you nothing, and you can delete any pictures that are not perfect. Select incremental settings of 1/3 stop, not 1/2. This gives you finer control when you are shooting for perfect instead of just good enough. Your object should be in perfect focus, exposed enough to show detail in the dark areas, with no warning "blinkies" in the light or dark areas, indicating no detail in the pure white areas or pure black areas. Since you are using a tripod, longer exposure is possible with no downside at all. By the way, if you use completely manual exposure control, light cannot creep in through the viewfinder and alter the setting of either the aperture or shutter speed!
Select ISO 100 for absolute minimum "noise" or grain in the picture. Use the maximum picture size and quality possible with your camera.
As for lighting, you want soft shadows. You can achieve this easily by shooting in the shade, or on a cloudy day. This is diffused, not harsh lighting. My best shade is achieved in the morning or late afternoon when the sun is off to the side, casting longer shadows with the shading object (such as a tree or building) off to the side so there is lots of overhead light from the sky.
Pay careful attention to your white balance. You don't want a yellow or a bluish cast to your picture. Your camera should allow you to select a custom setting, or generic "shade" setting.
With long gun shots, you may find it impossible or difficult to position the tripod and camera directly over the gun. If so, you can tilt the gun slightly towards the camera to correct this. I find that a glob of children's modeling clay works well behind the gun. You can shape it so it doesn't show, and it doesn't slip. If it wasn't invented for this purpose, it should have been!
If your camera allows you to shoot in "RAW" format, I recommend it. I prefer the DNG standard, as most processing software can accept it. I personally use Photoshop Elements 10 to "develop" the RAW image and convert it to JPG format. What the RAW format gets you is greater control over such factors as clarity, saturation, exposure, white balance, and bringing out details in the light or dark areas of the picture. This is at least 300% better for adjustment in post-processing than working with just a JPG image. Shooting the picture is only 1/2 of the secret to good pictures. The other 1/2 is in doing a skillful job of post-processing. Working with RAW images sounds like more trouble, but it's worth it to turn "good" into "perfect." I have recently been using both Pentax K-5 and K-3 cameras. Both allow you to save a RAW image with a button push concurrently with the last shot JPG image if you haven't turned the camera off. You can take a number of shots, and those that look good in JPG can also be saved in RAW format for enhanced processing capabilities. Most modern DSLRs can be set to take both JPG and RAW images concurrently, or to shoot only in RAW format. Don't be afraid of RAW images - take the plunge and take advantage of their versatility in processing.
Use your post-processing software to level and crop your picture. Leave plenty of space around the object being photographed; don't crop too tightly. The object for me is to allow one to imagine enough space around the gun to pick it up; this makes it more realistic. I use either Photodex's CompuPic, or PhotoShop Elements 10. Unwanted/distracting elements in a picture can often be erased or cloned away to make a better picture using Photoshop.
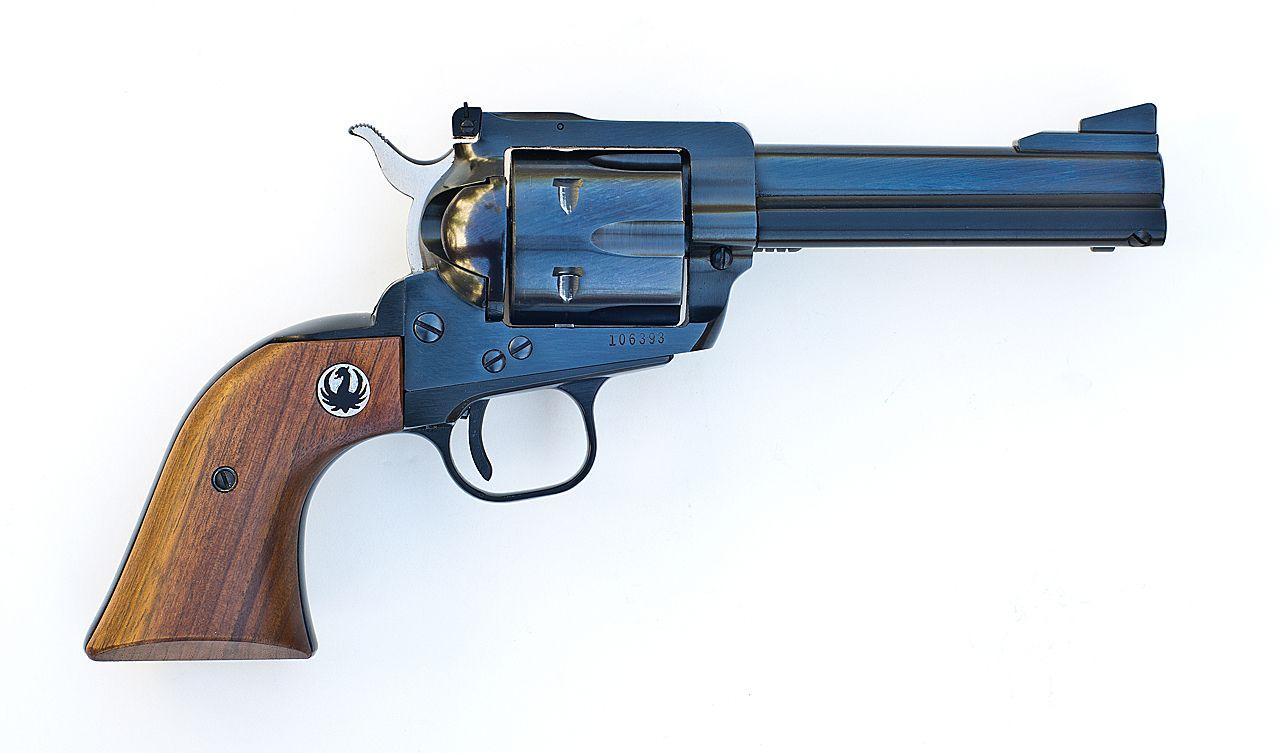
This picture of an old model Ruger Blackhawk was taken and processed using the techniques I have described:
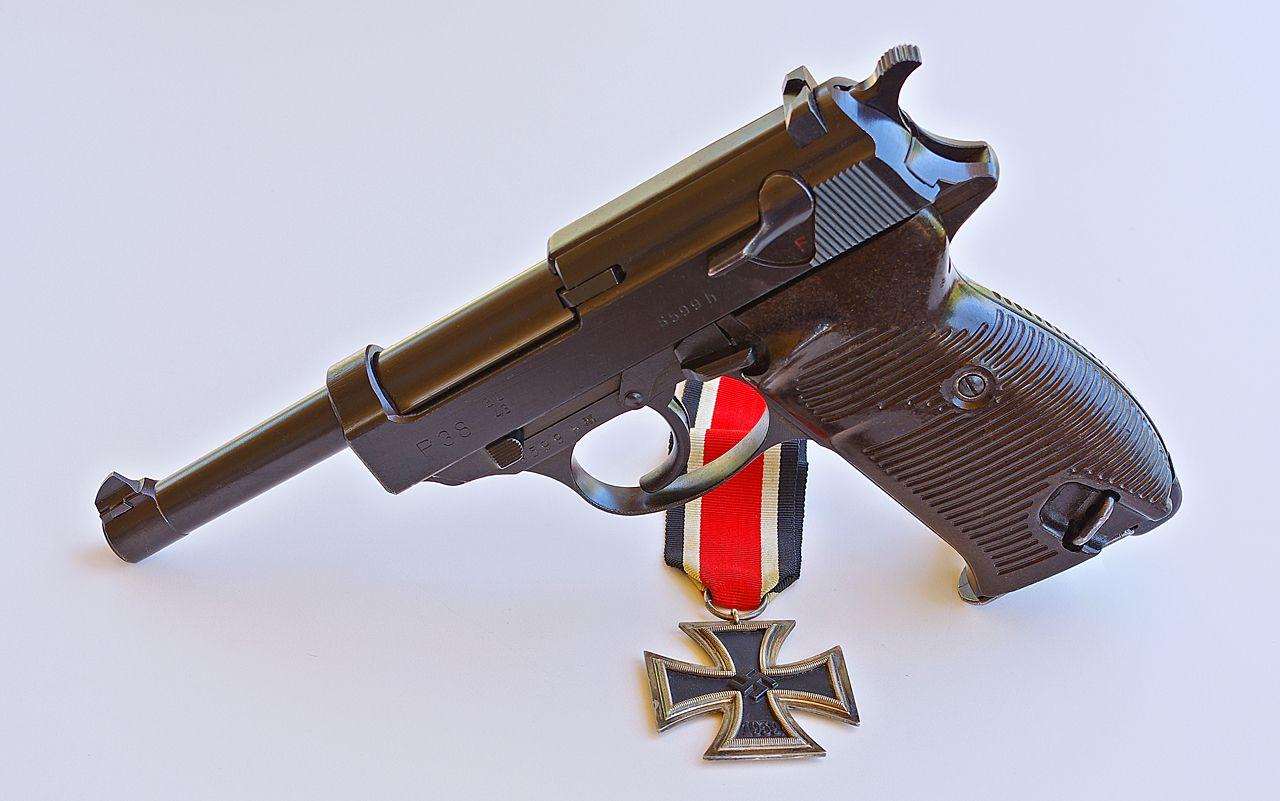
By taking advantage of RAW processing, you can handle tricky lighting situations such as this one, taken in spotty shade to give a more realistic sense of a classic Colt M1911 pistol of WWI vintage:

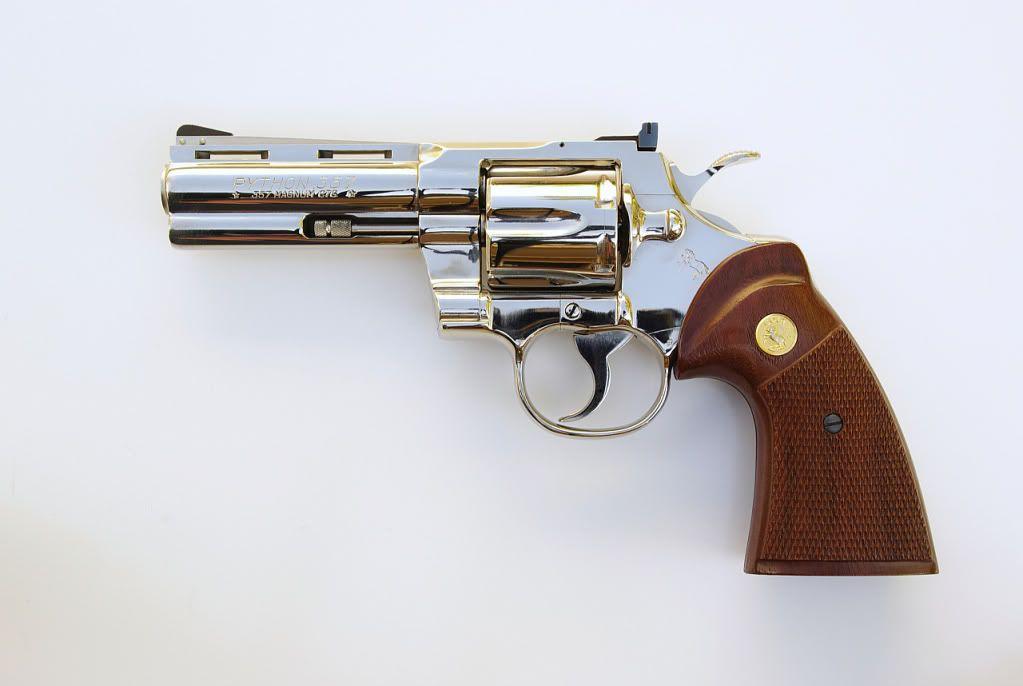
Here's a sample picture of a nickeled Colt Python. Notice that there are plenty of details in the light and dark areas, good focus, and no problem with the contrast of the white background. The shadows are soft from the diffused lighting, done in the shade outdoors.
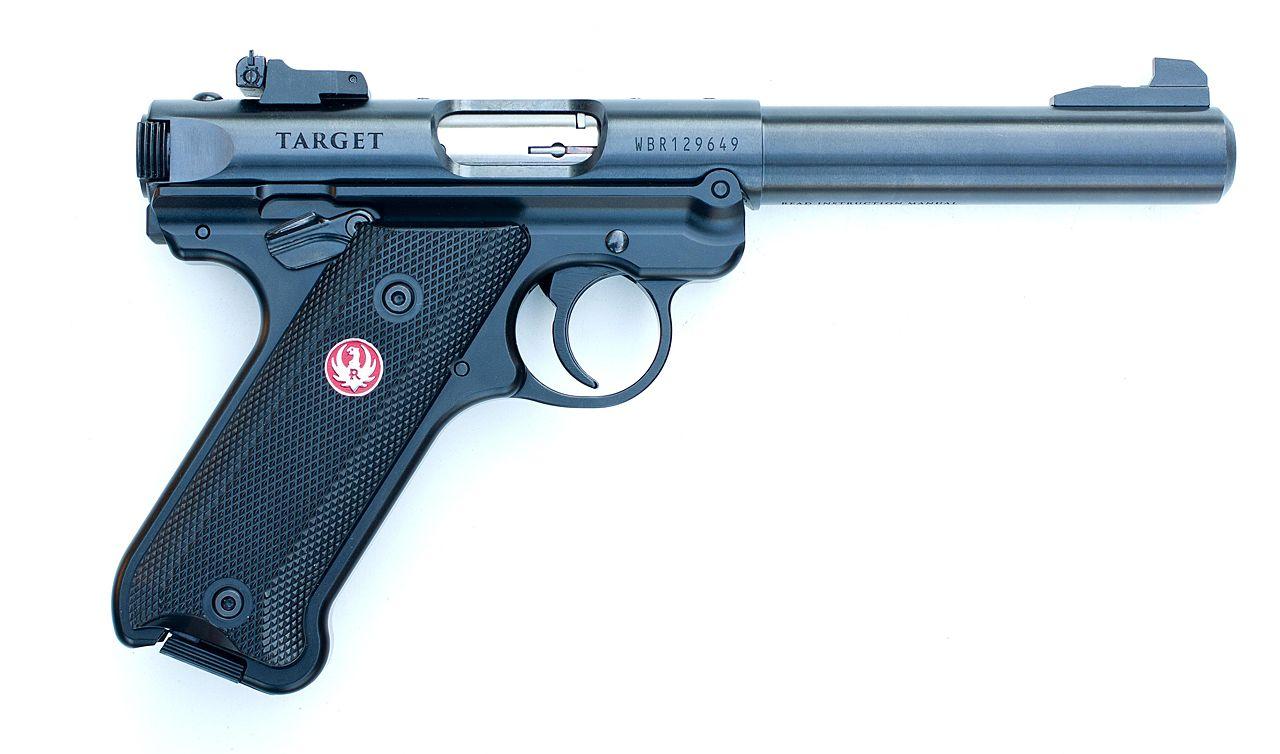
Here's a shot of the new Ruger Mark IV target:
Here's a shot of a longer gun, an 1855 Rifle Musket, almost 60 inches in length; same techniques, including the use of modeling clay to tilt the gun towards the camera.

The white background material in most of these sample shots is cheap white countertop board, purchased from Home Depot. I use a longer sheet for rifles, and a smaller one for handguns.
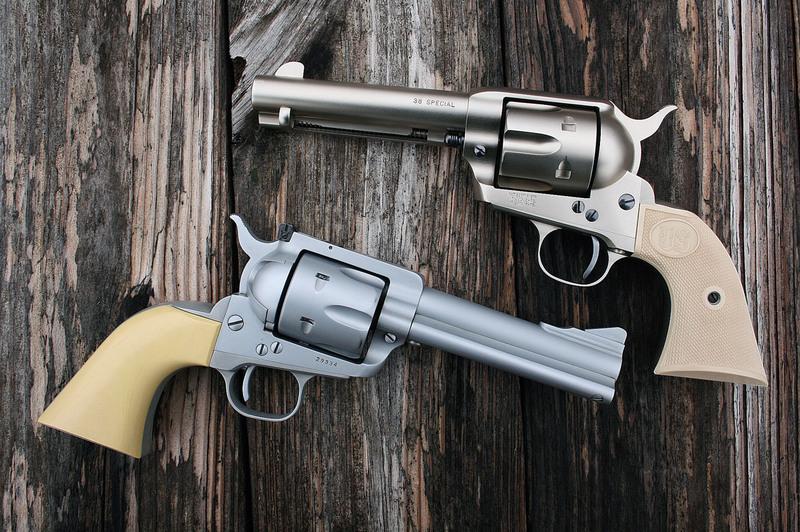
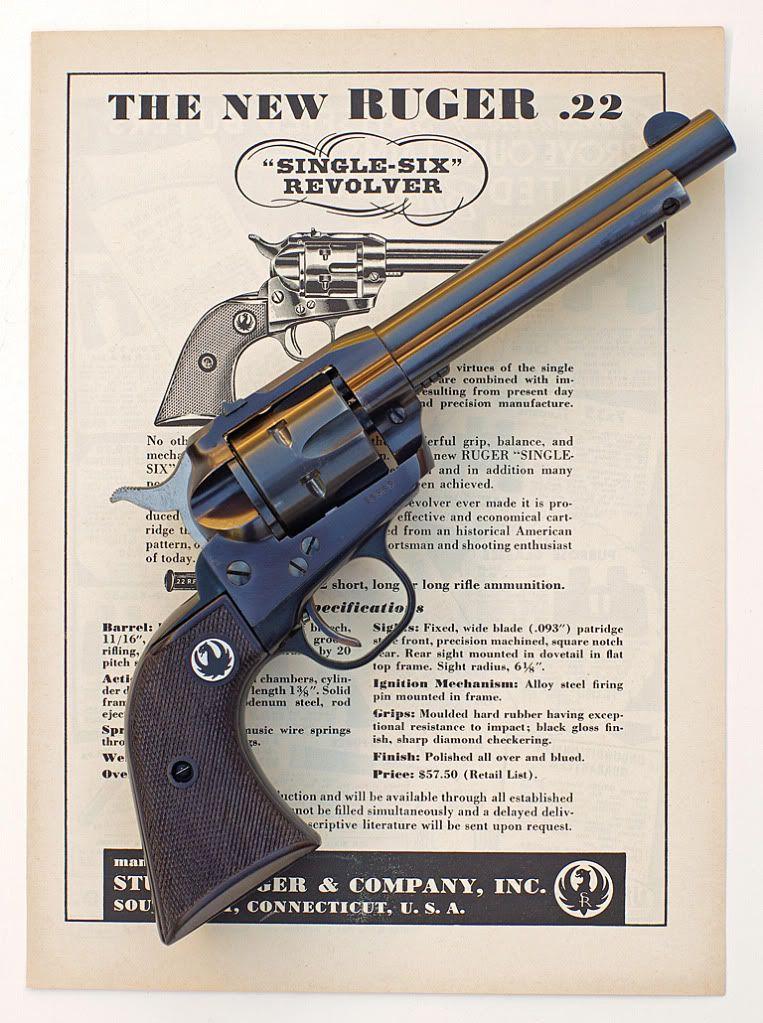
I find that often, period advertisements or instruction sheets make for great backgrounds, and give a lot of authenticity to your subject. Here's an early 1957 "flat gate" Single-six as an example.
I write the "Classic Guns" articles for Dillon's Blue Press catalog/magazine; they invariably use the photos I provide, which they think are as good or better than those they photograph in their studio. BTW, a subscription to that monthly is free, and can be ordered by calling 1-800-223-4570 and requesting it. You can also view past issues on line at Dillonprecision.com and then clicking on "Read the Blue Press" in the upper right of the opening page. My articles can usually be found by going to page 40 of whatever month you select, if you can get past the pretty gals on the covers!
As a final note, my first book, "101 Classic Firearms" has been printed and is available at dillonprecision.com. A number of Ruger firearms and thumbnail biography on Bill Ruger are included.
Good luck!
John
First, use a tripod. If you are using a digital SLR, and it has automatic image stabilization, turn it off. Your tripod will stabilize the camera, and the camera's attempt to stabilize the image sensor will just make it worse, introducing some unwanted fuzziness.
Lose the "haze filter" or any other protective glass in front of the lens. Use a lens shade. These things will help to ensure clarity and unwanted light reflection in the lens.
For utmost clarity, prime (fixed power) lenses usually work best because they have fewer internal elements. In spite of that, most medium-range or kit zoom lenses work pretty well and are more convenient. One problem I've found with the zooms is that when you work at the maximum wide angle setting (which is 18mm, or about 27mm in 35mm terms on mine), you may get some noticeable barrel distortion. I have an 18-55mm zoom range on my Pentax, and I find it best to use 35mm or better to alleviate this problem. Your lens may vary from this, but look for any distortion at the lower mm settings.
Use a cable release or set your camera to trigger with a 2-second delay. This absolutely minimizes camera shake from either your finger or the flip-up of the internal focusing mirror.
Forget automatic focusing. Look carefully through the viewfinder and focus manually; be sure the things you want to be sharp are indeed focused on.
Do NOT just look at the review image on the back of the camera to decide if the picture is exposed correctly. Your ambient light level will vary your perception of the image. Bring up the exposure histogram, and be sure all the peaks are within the two extreme limits, not cut off, and not way over to one side, unless a lot of your picture is either pure white or black.
Expose manually, controlling both the aperture and the length of exposure. Use a tight aperture; I use F/8 or better. F/8 is usually about right, giving you enough depth of field to be sure the entire gun is well in focus. Going down to F/12 or F/16 or even F/32 gains you nothing, and you may get chromatic aberration around the edges of what you are shooting. A high contrast background is no problem with manual exposure. Once you have the aperture setting, vary your length of exposure up or down until your histogram shows you have it right. With a digital camera, this costs you nothing, and you can delete any pictures that are not perfect. Select incremental settings of 1/3 stop, not 1/2. This gives you finer control when you are shooting for perfect instead of just good enough. Your object should be in perfect focus, exposed enough to show detail in the dark areas, with no warning "blinkies" in the light or dark areas, indicating no detail in the pure white areas or pure black areas. Since you are using a tripod, longer exposure is possible with no downside at all. By the way, if you use completely manual exposure control, light cannot creep in through the viewfinder and alter the setting of either the aperture or shutter speed!
Select ISO 100 for absolute minimum "noise" or grain in the picture. Use the maximum picture size and quality possible with your camera.
As for lighting, you want soft shadows. You can achieve this easily by shooting in the shade, or on a cloudy day. This is diffused, not harsh lighting. My best shade is achieved in the morning or late afternoon when the sun is off to the side, casting longer shadows with the shading object (such as a tree or building) off to the side so there is lots of overhead light from the sky.
Pay careful attention to your white balance. You don't want a yellow or a bluish cast to your picture. Your camera should allow you to select a custom setting, or generic "shade" setting.
With long gun shots, you may find it impossible or difficult to position the tripod and camera directly over the gun. If so, you can tilt the gun slightly towards the camera to correct this. I find that a glob of children's modeling clay works well behind the gun. You can shape it so it doesn't show, and it doesn't slip. If it wasn't invented for this purpose, it should have been!
If your camera allows you to shoot in "RAW" format, I recommend it. I prefer the DNG standard, as most processing software can accept it. I personally use Photoshop Elements 10 to "develop" the RAW image and convert it to JPG format. What the RAW format gets you is greater control over such factors as clarity, saturation, exposure, white balance, and bringing out details in the light or dark areas of the picture. This is at least 300% better for adjustment in post-processing than working with just a JPG image. Shooting the picture is only 1/2 of the secret to good pictures. The other 1/2 is in doing a skillful job of post-processing. Working with RAW images sounds like more trouble, but it's worth it to turn "good" into "perfect." I have recently been using both Pentax K-5 and K-3 cameras. Both allow you to save a RAW image with a button push concurrently with the last shot JPG image if you haven't turned the camera off. You can take a number of shots, and those that look good in JPG can also be saved in RAW format for enhanced processing capabilities. Most modern DSLRs can be set to take both JPG and RAW images concurrently, or to shoot only in RAW format. Don't be afraid of RAW images - take the plunge and take advantage of their versatility in processing.
Use your post-processing software to level and crop your picture. Leave plenty of space around the object being photographed; don't crop too tightly. The object for me is to allow one to imagine enough space around the gun to pick it up; this makes it more realistic. I use either Photodex's CompuPic, or PhotoShop Elements 10. Unwanted/distracting elements in a picture can often be erased or cloned away to make a better picture using Photoshop.
This picture of an old model Ruger Blackhawk was taken and processed using the techniques I have described:
By taking advantage of RAW processing, you can handle tricky lighting situations such as this one, taken in spotty shade to give a more realistic sense of a classic Colt M1911 pistol of WWI vintage:
Here's a sample picture of a nickeled Colt Python. Notice that there are plenty of details in the light and dark areas, good focus, and no problem with the contrast of the white background. The shadows are soft from the diffused lighting, done in the shade outdoors.
Here's a shot of the new Ruger Mark IV target:
Here's a shot of a longer gun, an 1855 Rifle Musket, almost 60 inches in length; same techniques, including the use of modeling clay to tilt the gun towards the camera.
The white background material in most of these sample shots is cheap white countertop board, purchased from Home Depot. I use a longer sheet for rifles, and a smaller one for handguns.
I find that often, period advertisements or instruction sheets make for great backgrounds, and give a lot of authenticity to your subject. Here's an early 1957 "flat gate" Single-six as an example.
I write the "Classic Guns" articles for Dillon's Blue Press catalog/magazine; they invariably use the photos I provide, which they think are as good or better than those they photograph in their studio. BTW, a subscription to that monthly is free, and can be ordered by calling 1-800-223-4570 and requesting it. You can also view past issues on line at Dillonprecision.com and then clicking on "Read the Blue Press" in the upper right of the opening page. My articles can usually be found by going to page 40 of whatever month you select, if you can get past the pretty gals on the covers!
As a final note, my first book, "101 Classic Firearms" has been printed and is available at dillonprecision.com. A number of Ruger firearms and thumbnail biography on Bill Ruger are included.
Good luck!
John