Factory Video - New Model Ruger Disassembly:
http://www.youtube.com/watch?v=UfOXBa8K8Ow
Factory Video - NM Reassembly:
https://www.ruger.com/videos.html?vid=131271984&cat=3769277
These sections from my Ruger Gunsmithing Primer will help and save you time:
#1. MY SHORTCUT FOR REMOVING JUST HAMMER and/or PAWL in New Models:
Recognize, when JUST NEEDING to remove the hammer and/or pawl, you do not need to hassle with the PESKY LOADING GATE SPRING, pull the trigger pin, nor trigger/transfer bar. Once you remove the grip frame, the hammer pin is the only other part you need to remove. After that, just pull the hammer back and all the way down, then depress the hammer plunger up into the base of the hammer with a small tipped screwdriver to clear the trigger extension with hole in it where the transfer bar connects to it. Let the hammer & pawl fall back, down and out. Reinstall the hammer and pawl back in the same way they came out. Push the plunger in by pushing it against the trigger extension just like you did with the tip of the small screwdriver, and the hammer will slip by the trigger extension. Piece o' cake.
NOTE: Occasionally a hammer change that doesn't cock or just barely cocks is because it's hitting the back of the slot in the grip frame. I have had to slightly lengthen the slot with a few file strokes.
If either the trigger or hammer pin are snug fits, after they're removed the first time, it's the opportunity to polish them so they're slip fits to put back in and remove the next time.
#2. NM HAMMER CHANGES and BASE SIZES:
Hammer changes are a drop in for any New Model, but hammers designed pre 2005 have a serious cosmetic issue on any gun or grip frame newer than 1997. And it's always an issue when swapping older designed hammers into the NVs and new Flat Tops, because they are the only models whose hammers (including the Vaq Montado hammer) were newly designed in 2005, therefore have the newer large base that properly fit the post 1997 larger grip frame ears*.
The SBH and standard hammers in the regular Blackhawks, original Vaqueros, and Single sixes don't fit well in all current production back to 1997 guns and grip frames because their hammers are all of the old 1973 design with small bases.
If I replace a grip frame and/or install a SBH hammer, the newer grip frame ears look better when dressed down flush to fit a pre 1998 main frame and its hammer or a SBH hammer. Although some aren't put off by the ears fit; it's no worse than they way they are shipped from Ruger.
If you have a blue gun you have to do some cold blue touchup though. And Ruger is not making any more blue hammers or triggers, all the new blue guns come with stainless Hs & Ts.
*Note: To simplify production in about 1997, Ruger increased the height of the standard cylinder frame mating surfaces on both sides of the hammer ~1/16" to match the Bisley model frame ears so any style grip frame could be assembled to any main frame. Therefore the ears on all other standard grip frames after 1997 had to be made ~ 1/16" taller as well. But Ruger has only enlarged the hammer base to match the taller grip frame ears on the newly designed hammers introduced since 2005 such as the New Vaq standard 'long horn' and Montado hammers, and the NM Flat Top Blackhawk hammers, and the .327 Single Seven hammers.
All other hammers designed prior to 2005 used on current model guns are small base and do not match the post 1997 tall eared grip frames. Some people don't mind. If I install a small base hammer in a post 1997 gun, I fit the grip frame ears to the hammer. I also have to do this every time I install post 1997 grip frame such as the N Vaq and Flat Top XR3 size steel grip frames or XRE-RED size steel grip frames on pre 1997 New Models or on Old Model Rugers.
The result is that the SBH hammer base doesn't fill the back strap ears in a post 1998 grip frame.
Mike Campbell photo.
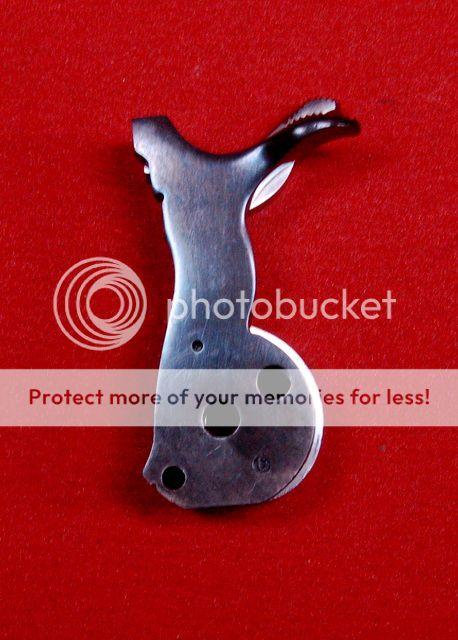
Montado hammer to ears fit:
Narrow shank/large base hammer on left side is 2005 design up thru current production with large base 1.122" – 1.130" (Flat Top and New Vaquero only and no longer just Lipsey's:
Mike Campbell photo.
The top small base hammer is 1.071" – 1.076" predates the 2005 large base new hammer designs. Measured on the centerline of the two large holes from back of hammer base to over the full cock notch.
The hammer underneath the SBH hammer is the New Vaq and NM Flat Top Blackhawk with large base 1.122" – 1.130" and narrow shank.
Mike Campbell photo.
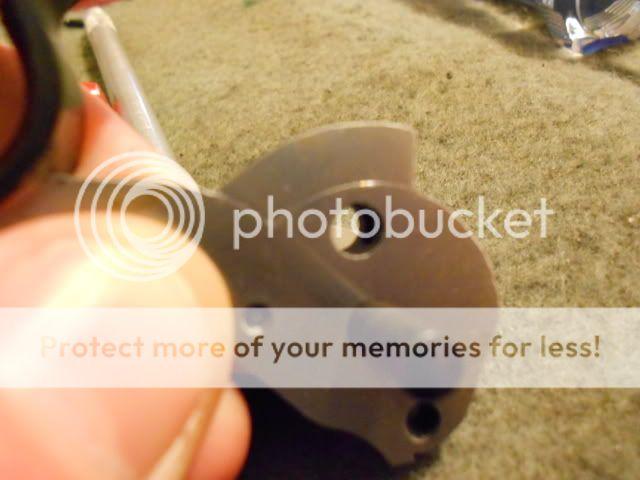
Hammers with a U notch in the upper hammer face appeared on some hammers when Ruger began to make new model mid-frame flat tops as near as I can tell. Hammers with the notch will function properly in the two different frame sizes.
But if the upper front extension of the replacement hammer face is longer than necessary, it will not clear the firing pin when the trigger is not being pulled and the transfer bar is in the lowered position. You will see the firing pin protrude into the cyl window. If that's the case, the extension on the hammer face should be relieved at the lower edge. It can be filed straight across, the u shape is not needed.
#3. TIPS FOR INSTALLING GRIP FRAMES:
Always unhook both legs of the trigger spring for reassembly, it's easier to get the spring behind the trigger shelf.
Always leave the cyl out so you can confirm the cyl latch spring/plunger is properly aligned on the latch so it has tension on it by seeing it sticking up thru the frame, before putting in any grip frame screws. Put the cyl pin back in the frame to keep the transfer bar from hanging up on the firing pin when moving the hammer up and down.
The cyl hand spring to the left side of the hammer goes plunger first. Also, you can put a small magnet over the spring to hold it in the hole and just let the grip frame push the magnet out of the way as the grip frame ear slips into position over the hole.
Install all five screws but do not cinch them tight. Align the grip frame edges flush with the cyl frame by tapping with the butt of a plastic handled screw driver. Tighten one trigger guard screw, then front screw and then one ear screw. Then tighten them all. Check for ease of hammer movement to be sure it's not rubbing on grip frame ears.
NOTE: While you have the grip frame off, it's always good to examine the upper end of all the grip frame screws blind screw holes in the main frame (especially stainless guns) for thread shavings that weren't cleaned out from the factory and get crammed in there by the screws.
Also check the two trigger guard screw holes where they are exposed by the milling cut if your grip frame has the two projections that go into the main frame (the New Vaquero and New FT BH guns no longer have these projections and milling cuts). Almost always there will be a huge flat 'roll-over' burr in each hole from the milling cuts that expose the holes. If they are present they generally cause the 1st 1/8" of removing those two screws to take extra effort to unscrew and can cause screws to screw in too tight and/or break off. You'll need to break off the burrs and pick them out with a dental pick or equivalent tool.
#4. Safety Testing AFTER CHANGING HAMMERS IN NEW MODELS:
The first thing to check is the transfer bar clearance with hammer for reliable firing pin function. When swapping hammers between two guns, it often helps To swap transfer bars as well for proper ignition and to insure the safety feature still works correctly.
TO TEST HAMMER/TRANSFER BAR FOR MISS-FIRES:
With hammer fully cocked, press on the transfer bar to extend the firing pin and observe how far thru the recoil shield it protrudes. Now keep the trigger pulled back, drop the hammer and observe the firing pin again. If firing pin protrudes the same amount, you're good to go. If it doesn't protrude the same amount, you need to remove just enough metal from the top face of the hammer nose so the transfer bar is pushed tight against the firing pin and the frame. If you remove too much, the transfer bar will not perform its safety function and will be pinched. Also make sure hammer has no friction or contact with grip frame ears around its base to slow its fall and you may have miss-fires; another potential issue when making hammer changes.
IF TRIGGER DOESN'T RETURN, TRANSFER BAR IS PINCHED AND SAFETY IS NOT WORKING:
If the transfer bar is hanging up under the hammer face, since it's connected to the trigger, it prevents the trigger from returning. The transfer bar is slightly too thick. If both ends of the trigger return spring are connected (under the grips), or even if you have only one leg of the spring connected it should pull down the transfer bar if it's the correct thickness. When this happens, the transfer bar safety function will not work. If the gun were dropped, a live round in the chamber under the hammer will fire.
This is not uncommon however, and it's a very simple fix. File the second step of the hammer face, counting from the top, just a bit until the bar no longer hangs up. Don't take too much off or you'll have miss-fires. If that happens file a little more off the top step of the hammer.
IF YOU HAD TO MODIFY HAMMER NOSE:
At the range, double check the safety function by loading a live round in the next chamber to cycle under the hammer, point down range, cock the hammer, hold with thumb, release the trigger to uncock the hammer, take finger off trigger and release your thumb to let the hammer fall. The round will not fire if safety transfer bar is functioning correctly.
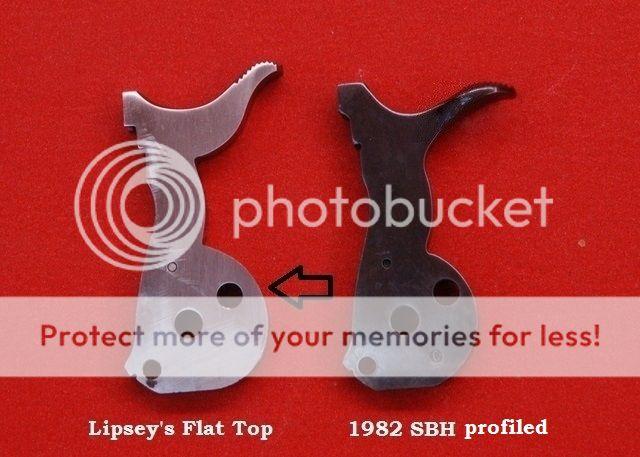
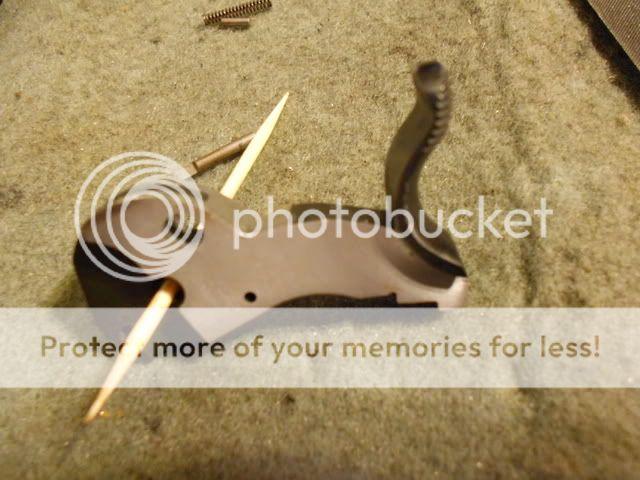
#5. MODIFYING BISLEY HAMMER/TRIGGER FOR PLOW HANDLE OR BIRDSHEAD GRIP FRAME:
It's just a matter of dressing down the hump to fit the plow handle grip frame backstrap and elongating the trigger slot.
Before you trace your old hammer, make sure it fits flush with the grip frame 'ears'. If not you'll want to leave the Bisley hammer larger than the original to final fit flush with grip frame ears.
Use the hammer pivot pin to hold the original and new hammers together and scribe both sides, then grind, file, sand and re-blue (if blued), the portion you filed away. If hammer won't cock, the issue is that the back of the grip frame slot just needs a very slight lengthening with a small flat or triangular file.
I "hog off" most of the metal with an 1/8" x 1" Dremel course stone; hammer in a vise, or use a cutoff wheel mounted in a bench top grinder. Then true up the course grinding by 'draw filing' with a small double cut triangular file and then square up the corner at the top of the hump. Finish with 600 grit paper wrapped around a 1/4" x 1/2" alum sanding block with flat surfaces, heat with hair dryer, and re-blue with NU Blue or Brownells OxPho blue. That will match the factory finish which is not a high polish. For a higher polish, follow up with 800 grit and 1000 grit. Polish with a Dremel flannel wheel using white rouge made for polishing stainless steel. Then blue.
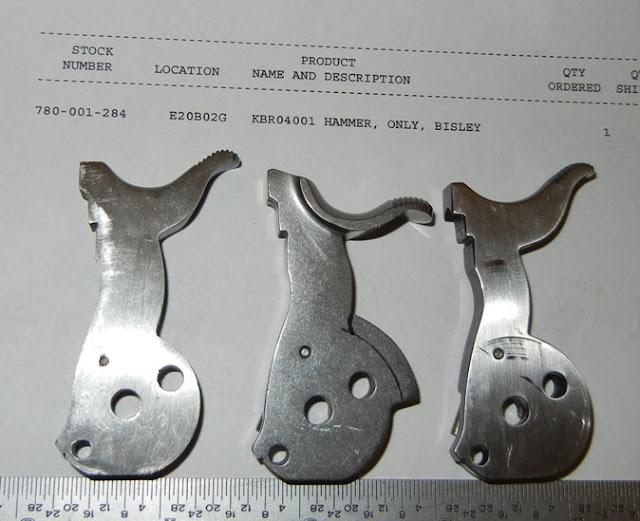
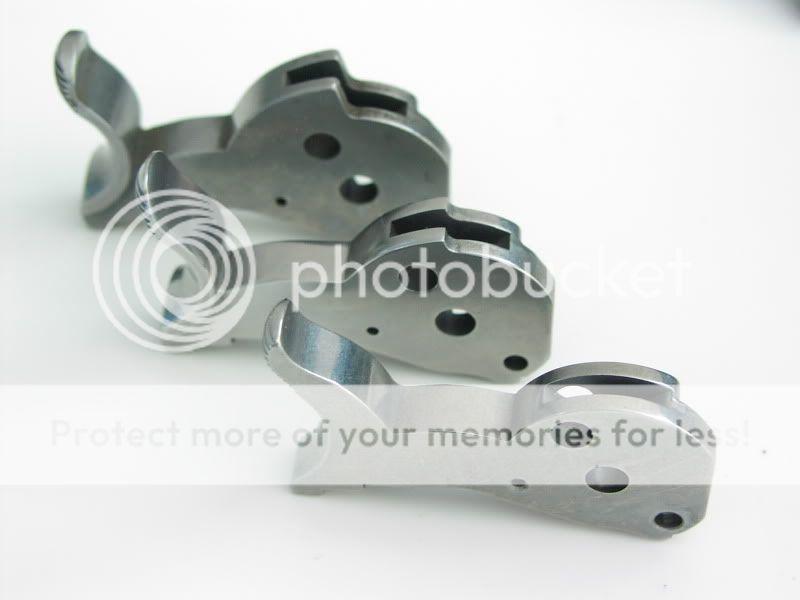
Small base hammer, Bisley hammer, large base NM FT and NV hammer:
For Colt forum: http://i292.photobucket.com/albums/mm35/tk3945/DSCN0594.jpg
http://www.rugerforum.com/phpBB/viewtopic.php?t=136817
http://www.rugerforum.com/phpBB/viewtopic.php?p=1543606#1543606
Stock Bisley hammer in rear, Bisley modified to large base center to fit NV and NM FT, and standard small base hammer in front:
(photo by G2)
#6. BISLEY TRIGGER INSTALLATION FOR PLOW HANDLE OR BIRDSHEAD GRIP FRAME:
The slot in the grip frame must be extended a maximum of 5/16" and the 45 degree angle at the front of the slot replicated to install the Bisley trigger in a plow handle or birdshead GF. The best way to do this is with a cutoff wheel in a Dremel tool. Another option is to shorten the front end of the Bisley hammer to fit the existing slot.
For old models, since the Bisley is a new model trigger, the screw hole is in the wrong location. The Bisley trigger spring would work fine with a new model grip frame on an old model if the trigger were modified thusly: weld up the pin hole in the Ruger NM Bisley trigger and relocate/redrill it to work in the ROA. Cut off the bracket for the transfer bar and slim down the front of the sear to work in the ROA hammer notches. To work with an old model grip frame return spring, also grind off the NM spring shelf.
The shorter the slot or less you take off the front top of the trigger, the further back the trigger will sit when at rest. As long as the trigger returns far enough forward to clear the hammer full cock notch. The contact of the trigger with the front of the slot dictates how far forward it will be when at rest. I now position them farther to the rear than shown on my Super Single Six above for my fat trigger finger. Although when cocked the trigger repositions far to the rear. The curved Bisley trigger is a vast improvement for my trigger control and feels like my rifles.
Transfer bar pinch:
Video: https://www.youtube.com/watch?v=9sE54jvfz5Y